Manfrotto BeFree Travel Tripod – When Weight & Strength Matter

When you need support for your camera (or smartphone), and you are on the move, a solid tripod is the call.
On the move is the key phrase as I like to travel as light as possible, while getting the results I need.
Through the years I have tried many solutions, and have come to this list of criteria for the right tool:
*Weight
*Size/Length when closed, and max height
*Versatile ball head
*Price
There are a lot of options out there, and this Manfrotto Befree Advanced AS twist carbon tripod checks all the boxes.

At the end of the post I’ll give you a concise pluses and minuses on this tripod!
Continue Reading »

National Geographic Tours the Gems Of The USA Parks

Nat Geo has had a strong year of high-quality specials, from biographies of well known and diverse types of photographers, to capturing the beauty and wonder of the ocean.
If there is one thing you are guaranteed of, is stunning cinematography. always. Period. End of story.

This latest exploration focusing on the National Parks:USA is no exception. Starting streaming Sept 8th.

From sharing the experience of being together with rock climbing experts that will take your breath away, to macro photography of beehives like you have never seen before, to views from the skys of these majestic lands from one of the finest aerial cinematographers today. Continue Reading »

The Goldilocks of Ear Buds – Last One is JUST right!

I know that we have all probably had a pair of the ubiquitous white ear buds.
Reality is they don’t last forever.
True story is that the battery will only be able to be charged a certain amount of times, before they are ready to recycle. The quality deteriorates, and you will soon need a new pair. I did.
Maybe now is that time for you look around and check your options!
Now, the main thing I use ear buds for are Zoom calls, podcasts, calls on the phone, and of course the primary – music!
What I look for is a fast connect to each device, without having to go into system preferences to select a headset. Just want to pop them in, and be connected.
As I do review a bunch of headphones, I usually have about 9 headsets pre-connected to my computer and phone.

Here is a comparison of the 3 sets Poly ended up sharing for review, with a winner revealed:


Continue Reading »

National Geographic OceanXplorer – Under The Sea With Your Host, James Cameron

The last time we wrote about Nat Geo doc series, they were concentrating on the photographers life story along with their work.
This time, they take you deep into the ocean with a group of scientists and cinematographers to show you the world beneath the surface as you have not it seen it before.
At the heart of it, the OceanX project is dedicated to the research and sharing of the oceans secrets.The physical OceanXplorer ship has multiple labs, exploratory vehicles and more, all on board.
THE SERIES PREMIERES AUG. 18 ON NATIONAL GEOGRAPHIC AND STREAMS NEXT DAY ON DISNEY+ AND HULU

The superior quality of the team at Nat Geo and BBC Studios will get you a scientists view of the world under the sea, and you will see things rarely, if ever, seen before!
James Cameron introduces, and narrates each episode.

Aldo Kane with dive team James Loudon, Dave Reichert, Stephen Hudson, Nuno Sa and Emma Hatherley holding underwater cameras in the Sub Hangar. (National Geographic/Mario Tadinac)

Continue Reading »

#TBT Interview with Lauren Greenfield at Annenberg

From the Photoinduced youtube archives:
An interview with Lauren Greenfield at the Annenberg Space for Photography in Los Angeles

JOBY Wavo Plus – Starter Mic for Vloggers

In recent posts, we covered mobile content creation tools, and ventured into the audio portion as well, so was very curious to check out this lightweight feature laden mic.

JOBY sent over this mic, the Wavo Plus, for review and had no input into this post.


First of all, this mic comes with most of the cables you need to connect to your camera, computer, and Android phone. To connect to an iPhone, you will need a USB-C to Lightening adaptor or cable.

 
Continue Reading »

My Fave EDC, ShiftCam, Is Launching New Products On IndieGogo

A little while ago, I featured tools for mobile creation, and highlighted the the ShiftCam brand of products.
The SnapCam is always in my bag, as well as the magsafe cold shoe.   I’m all in for the ease of use and modular mag system of ShiftCam.They just announced a new group of products on Indiegogo that will definitely pique your interest even if you are already in the system.

Starting with a new grip with a larger 5000 mAh battery to charge your phone while you shoot, and for me, most excited for the Studio light, which is a perfect flat light for vlogging and small product shots.
Some of the other items are some new tripod choices, but it’s the light that’s the star for me.
Continue Reading »

Tools For Mobile Creation – Part 4

We’ve covered the basics, now let’s look at some extras, including one small but essential item in every camera bag.
In Part 1, we discussed the various ways to hold your phone. Now, let’s consider the options for tracking, enabling you to move around freely or track your subject while keeping them perfectly framed.

For a stationary position, like on a tripod or tabletop, allowing for subject movement, the Pivo has been leading the pack. Once your phone is secured into the base and connected via Bluetooth, it can track a subject in 360º, moving in a circular path. Their latest version also tilts up and down, offering even more flexibility for creators.


Gimbals are another fantastic option, and there are many choices out there. When using a gimbal while walking, adjust your walking style to achieve the smoothest footage, minimizing any up-and-down motion. While gimbals can significantly smooth your footage, they do have their limits.

I recently dusted off my trusty DJI OSMO 3 (now up to version 6) and it still works like a charm. It connects quickly, folds up neatly, and performs as expected. However, adding a mic or light can be tricky, requiring an attachment with cold shoes. Without this attachment ring, the add-ons can throw off the balance if mounted directly on the phone, defeating the gimbal’s purpose.

I find having a coiled cable gives the best flexibility for switching from vertical or horizontal format, plus makes it a little cleaner rig.

Here’s another solution: the Insta360 Flow Pro gimbal with Apple Dockit.

With the Insta360 app, tracking is excellent, and the DJI MIMO app for the OSMO 3 also offers a similar active tracking feature. The Insta Flow Pro might be more automatic, whereas the DJI setup requires you to draw a rectangle on the screen to select your subject for tracking.

Lightweight and compact, the Flow Pro pairs easily and features built-in tripod legs for stability. However, adding a mic and light still presents challenges. The distance from the phone to the handle requires a longer connecting cable, potentially affecting tracking and balance.

Ultimately, the gear you choose depends on the content you want to create. With a cage or Shiftcam, you can attach lights and mics, leaving smooth footage up to the operator. If you’re stationary, a gimbal isn’t necessary, but it can provide smoother footage, albeit with some limitations regarding additional accessories.

And don’t let your phone’s storage space limit you. You can use a lightning drive or USB-C for a micro SD card to save your videos. The Blackmagic camera app (free) has a media tab for viewing media cards. When I got my Lexar set years ago, it included a USB-A card reader for easy connection to a computer or use an SD to micro SD holder for media loading.

Here are possible solutions where you can connect your micro SD card directly into your phone. Shoot and transfer onto the card and delete off of the phone saving space. Available for USB-C and Lightening.
Yes, there are solutions that will allow you to record right to an external SSD, but this is a nice compact solution to space saving.

One item always in my bag is the Apple SD card reader. It’s invaluable for quickly transferring photos from my mirrorless camera to my phone for fast social media posting.


While there are manufacturer apps for this, I prefer direct connections for reliability. When you plug in the reader, your Photo App will prompt you to import files from the media card, allowing for quick editing and posting.

Here is a real world recent example: At Tribeca there was a screening of a Steve Van Zandt doc. After working the step & repeat, I took my seat in the theater. Before the film started, I connected an SD card t the phone, selected jpgs, did some minor post work and uploaded to social, before the movie started.

Yes, there are other off-brand SD card readers, but I stick with Apple for reliability.

New parts coming soon! The introduction of new mobile creation tools is exploding! Like this Lexar SSD on Kickstarter.


Tools For Mobile Creation : Part 3 – The Power!

We have walked through some of the simplest to more elaborate set-ups to create content on your mobile device in part 1 (the basics) & 2 (the audio)

Now, when you start adding the extras, they take power, and if creating content on your phone, you are gonna be needing some extra juice. But you knew that!

The most boring, essential parts of your mobile kit.

There are 4 options I use and will recommend. Each one has its particular features and depends on your use. I have had these for a while so the latest with newer features are available.
BTW, Amazon has prime day coming up so a great time to get new batteries! Usually, they get discounted.

Please note before starting any creation situation, always start with a full charge!

Below is the Mophie 5kmAh magsafe with a folding stand, the Mophie power station, the iWalk Power Squid dual cable, and the Anker 737 power bank

Starting with the Mophie with the folding stand. Mophie snap+ juice pack mini

If I’m going to be outside, and editing on my phone, this battery gives me enough extra power, and will stand up the phone for a non-handheld advantage. Great when stopping for a coffee and getting some posting done.
MagSafe, so no cables needed. Sure, you can charge up your airpods through the USB-C port, but save your power. In a pinch, fine.
About $50

The Mophie 10K mAh basic block with fast charging, and also dual ports for charging 2 devices at one, and you need cables. Not magsafe. But this comes with me when I need a super fast charge, as I’m starting the day.

A good alt is the iWalk power squid which has the 2 diff connectors built in, and a great feature is a LED window showing you a % of power available, instead of the vague 4 dots on most units. I like the built in cables, and use this when I’m around the neighborhood, and may not be able to locate my charging cables immediately!


9000 mAh
About $60, and currently they have added a mini usb cable onto the unit, so 3 built in cables. I don’t replace my batteries often, just use the best for the situation.
Now there are a few batteries out there now with built in cables. Buy a reputable brand, as a cheap or bad battery can do more damage than good. I’ve had some of the gift bag batteries overheat and had to properly toss.

Then comes the big one: The Anker 737 power bank

When you are out making a ton of vids, and using all the gear, including an iPad or other tablet, the clear winner is the Anker 737 power bank.
24000 mAh, a beautiful info display, 140 W High Speed input and output.
Sure, it weighs about 1.4 lbs., although if you are out creating content all day, need to edit, and post, you’ll appreciate all the power you get.
You can charge it up, while charging the other devices so a win win situation.
And it is approved to carry on a plane.
Charge a laptop, iPad, phone, ear buds OR your mic receiver/transmitter, light.

Anker does seem to be the current leader in this space, being followed by Mophie.

So……..
Are batteries one of those boring things to add to the kit?
You bet.
Are they essential?
You bet.
Chose reputable brands, make sure they are fully charged before adding to your bag, have duplicate cables when required as back-ups.
In the next part will be the items that will enhance your work and become tools you will always want with you!

Tools For Mobile Creation: Part 1

Yes, it’s Part 1 as there are so many tools available and choices to make.
And it’s all about using your mobile device to make the content.
Luckily, I’ve already gone through a bunch of options and hopefully can lead you to right choices for you.
First of all is the basic capture.
And deciding if you are looking to create interviews or scenario type of videos, or be the presenter, ala selfie.
To start: For interviews
Bring out your phone, choice the orientation, and hit video or cinema on the camera app, and go!
It does work great, and if you are a steady hand, you’ll get usable content. No need to buy anything!
BTW, Apple just released a free video app called Final Cut Camera, which gives you a deeper dive into video options. Just downloaded, and seeing how it compares to others.
Depending on your scenario, you may want to add the Joby Beamo magsafe light, or the ShiftCam SnapLight to fill in the shadows a bit.


Easy right?
I use this approach a lot especially on the street, if I’m also capturing stills. Fast, not intimidating, decent sound (more on that later!)
The lights will also do you right when doing the selfie type vids. Shoot, post to social, and there you go.

But you knew all of this.

Let’s get into the tools that up the level.
The simplest and effective gear is the ShiftCam SnapGrip creator kit system.

Using MagSafe, it attaches easily, and fast to your camera, and incorporates a BT shutter release, and a battery so you are charging your camera while it’s mounted. Knowing that the phone ischarging while you shoot is a big comfort factor

It’s easy to orient your camera in a vertical or horizontal direction.
To up the set-up you can stack add their magsafe light, which has an additional mirrored surface to allow you or your subject to see what is being videoed.
Not sure that you want your subject to watch themselves, but it does get their eyeline into the proper camera lens. Maybe most useful when doing presenter or selfie, the now current vlog format, while making sure you are in the frame.
The ShiftCam system does incorporate a magsafe extendable arm that connects to a mini tripod to give your arm some distance.
I do wish there was a standard ¼-20 thread to give options for mounting.
Another add-on recommended is the magsafe SnapShoe.

It kind of stacks with the others and lets you add a different light to your rig, or maybe an external mic!
And alternate to this is the Ulanzi magsafe grip. This is also BT, and has a built-in cold shoe, and a ¼-20 thread on the bottom. No built in battery.

Which one is best for you? The Snap is def a more robust build, and the built in battery assured me I wouldn’t go dark when recording. Plus, it has a case to keep it from getting trashed in your camera bag.

Then we get into the camera cages that give you many more possibilities to add on accessories to the rig.
My main is the Beastgrip. With a solid build, and ability to adjust to many diff phone sizes, this is my first choice. A spring loaded holder,not mag safe, and a bunch for ¼-20 threads to add extras.

With plenty of ¼ -20 threads to add cold shoes to mount lights, mics, SSD drives, plus a great handle, when covering trade shows, this rig has the raw capability I need.
Another option is the SmallRig Universal phone Video Rig Kit, which also has the ability to add things, And the form is more of a 2 handed balance with cold shoes in the handles.

It does have a much larger footprint than the Beastgrip, once all things included are added on. I do see it on sale now and again at BH, and have purchased for about $120, same price as the Beastgrip, although it comes with a ton of extras (light, mic,tripod), and a case. The Small Rig full kit does have an extra holder for an external battery to keep you from running out of power. Or an SSD drive
Admittedly I have pillaged the Small Rig accessories to add onto the Beastgrip and Snap.

Neither of the Beastgrip or SmallRig are mag safe as of this writing.
In other words, you need to put your phone in and secure via a spring-loaded grip or screw tighten holder.

Ok, we have now gone from simple and light, to complex and heavier.
Covered some small footprints with the grip options.

Next up in Part 2 is audio!

Mid Year Gift Guide 2024!

Well, as we get ready to start the summer season, it’s a good time to have a look at some items that may enhance your giftee’s summer adventures.
Some you’ve seen in earlier gift guides, and a couple of new items. (BTW, there is a great deal this weekend on of of my favorite items, at he end of this post!)

For a good fun time, we all capture moments on the phone and the new set-up from Shift Cam sure does help!
With the Shift Cam SnapGrip camera holder, thanks to magsafe, which is the only way to go these days, you can attach your phone to this handle and shoot your phone like a camera, with a Bluetooth connection, and there is a shutter button on the handle.


In the center of the light, there is a magsafe fill light with 4 diff intensities,
plus a mirrored surface  so you can see your framing on selfies, OR your subject can see themselves. It is removable (another magsafe feature)

In the full set it comes with a case, a mini tripod and a mag “wand” to let you hold the phone away from you.

And you can charge your phone at the same time as there is a battery built into the grip.

Along with this set-up they also have introduced a new mobile camera bag, which is  built around mobile, and it’s perfect.

Screenshot

Yes, all photogs love camera bags, and this one will be a great addition to the lineup. There is a smart zipper in the middle of the top flap for easy access to your goods. I carry a Fuji 100VI and the phone, plus extras in this case.


You can even get a mag clip to attach your camera to get a body cam video, and it can clip to the body of the bag or the strap.

Screenshot

Honestly, when I first saw this set-up, I was super concerned about having my phone attached by mag only.

Don’t worry, they include a special phone leash to secure your phone and make sure nothing detaches when it’s not supposed to.

One issue I did have was on the “workstation ” feature. When it was all extended for easy access I wish there was material to to give me more working area on the sides.

Now If you want another choice for adding light to fill in those nasty shadows, without a grip, the Joby rechargeable Beamo Ring Light, thin light, also with varying intensities is the way to go. Magsafe, very thin, and it comes with a pouch for when you aren’t using it.

Of course everyone needs a Joby GorillaPod!

I have a full compliment of sizes, with ball heads, and at the top range they can hold a full size video camera. The ability to be infinitely adjustable with the special legs is genius. I have wrapped the legs around a round railing, with a big vid camera and it was secure.

Disclaimer: If you do that you should confirm that all is secure.

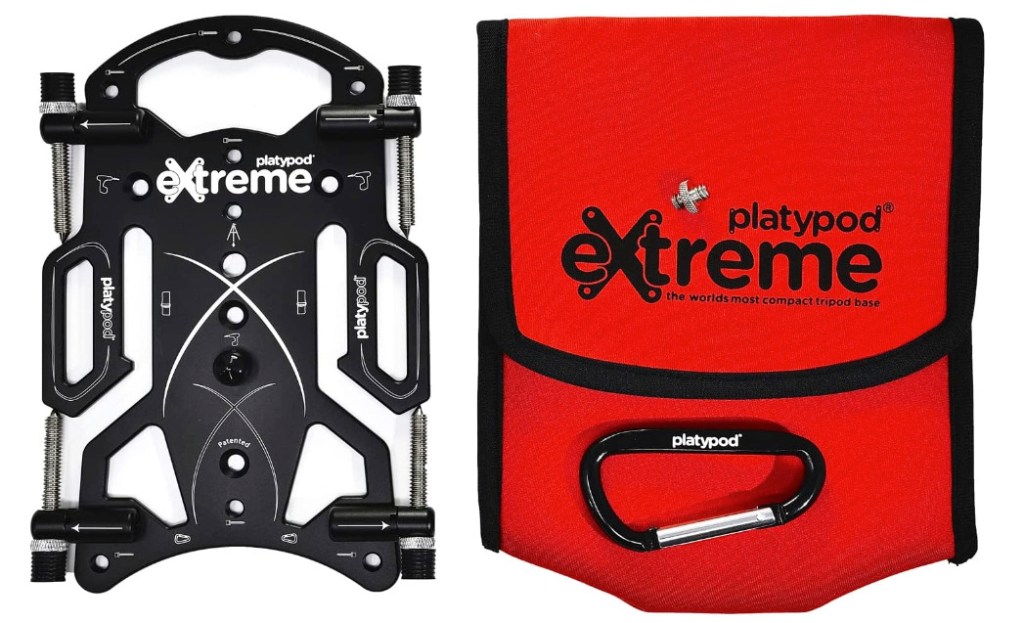
Another solution is the Playtpod Extreme tripod base. With a solid flat base and with enough holes to add on any numbers of accessories, you can do some great closeup photography.

They added a versatile handle to the lineup this year, which can be customized for hight, and has a ton of 1/4-20 holes to add, lights, flexible arms, and of course a ball head.

A super compact tripod system that is so versatile, every photographer should have this set-up. For the setup below I added in 2 Lume Cube lights, a Manfrotto ball head,  Joby BT remote, Ankerworks mic system, and a phone holder.

Different choices, but each one of these are great tools/gifts.

Then for the traveler:
Mag safe is the order of the day.

Here are the 2 latest to consider:

Anker has come out with a compact cube that transforms into a phone/watch/ air pod charger. Tiny footprint.

When I first saw this, thought it was a little heavy, but that was just for balance. It’s so small you need some weight, so it doesn’t fall over!

In the same category and even smaller, is the Twelve South butterfly.


This small folding circle can be configured in a few diff ways.


Charge both the phone and a watch, or just a phone. With the new iPhone app, you can set it, so you see the screen, and it’s your alarm clock!

Yes, can be done with a watch for an even smaller footprint.


It’s a beautiful design, and super small and efficient.

On the air pod pro, your case can use some protection.
The Catalyst case is waterproof up to 330 ft, and you can charge up though the case wirelessly.


On the plane:

First of all, I will not use ear pods on a plane.
Nope.
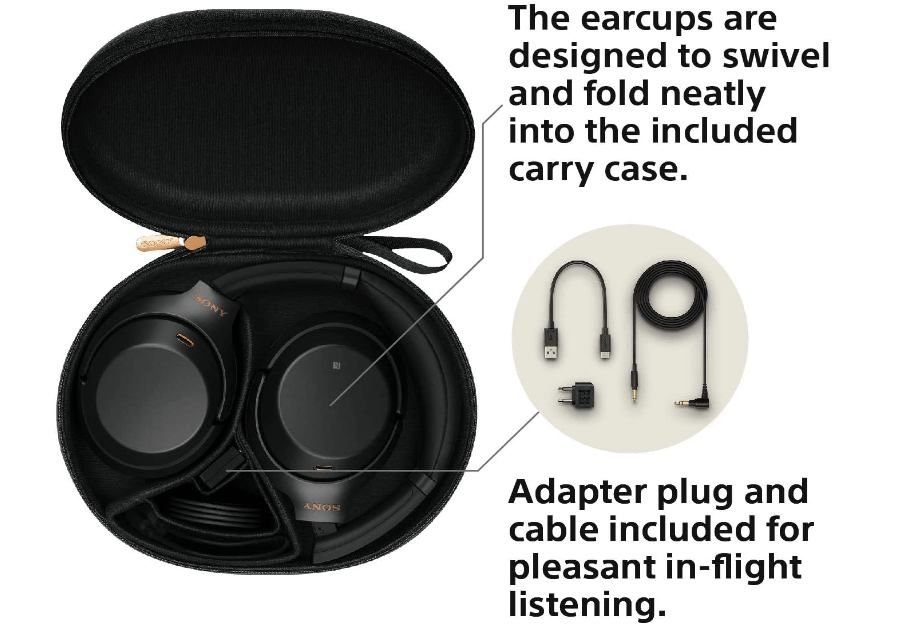
After having one fall out of my ear on a plane, and crawling around down 8 rows looking for it, I will only use over the ear headphones, and a Twelve South AirFly Pro.

Everyone you gift this, will thank you profusely after just one flight!


And of course, stash all of these item in a Peak Design Tech Pouch. Plus cables, laptop dock, Samsung SSD drive, and more.

Last gifting item on the list is  the best. Wrist . strap. Ever!!
The Spider Pro HandStrap V2

I have tried em all! These live on my camera body’s 24/7.
By attaching to the side, and then screwing into the tripod hole on the bottom, you can either use the included ¼-20 lug , OR I use the ring from a Black rapid strap.
This strap is adjustable, comfortable and honestly helps make the camera an extension of my hand, while being able to easily get put back into my peak design bag when done shooting.
Keep an eye out as they do have discounts time and again. As matter of fact, there is a Memorial Day special of 25% off!

There you have it! A mid-year guide that will give you, or your giftee a smile from each product.

Fuji Expands the Line-up: Pro and Enthusiast

Fuji today announced 2 new camera body additions to round out an upper echelon Pro Line, GFX 100S II and an enthusiast camera body, X-T-50. They are on a tear with new gear! Plus a new kit lens fro the X- Series, 16-50, and a sports lens at 500MM for the GFX series.

Since I will not be putting these in my hands till a Fuji Summit on 5/16, all I can share is what I’ve been told
Sure, it wasn’t that long ago that the X-100VI was announced, sold out, and is now on backorder. Maybe the X-T50 is your proper call as an upgrade from your smartphone.

But I digress. There is a lot here to digest, so let’s start with the big deal.

This new offering take in improvements in the Pro GFX line, with a new 100S II. Here are some photos and spec sheet below.

Basically- better AF better IBIS, Cam To Cloud Built-in ( a new feature on all of their new cams. There will be a separate post on all of that)

To be perfectly honest, as every fine art exhibit I have been to in recent weeks, shows photos that are made with larger format cameras, this camera should appeal to both the commercial photo, and the fine art shooter.

Honestly, I’d like to put this small, lighter weight, 102MP cam on the street and see how it feels. Of course fast AF is essential, and the smaller footprint could make this a worker on the street.


The Official Word:

 Lightweight, High Speed: Fujifilm Introduces FUJIFILM GFX100S II Mirrorless Digital Camera 

All the Power of the GFX System in a Small, Light Body Designed for Image Makers 

FUJIFILM North America Corporation, Electronic Imaging Division, today announces the latest addition to its GFX System mirrorless digital camera lineup, FUJIFILM GFX100S II (GFX100S II). This new camera harnesses the image quality and key functionality from the larger GFX100 II mirrorless digital camera, in a smaller, lighter GFX System body designed for image makers who want to expand their system and/or are seeking an entry point into large format photography. 

“Our GFX System continues to revolutionize ultra-high-resolution, large format image making by taking it out of specialist studio environments and putting into the hands of passionate creatives across all genres, styles and applications,” said Victor Ha, vice president, Electronic Imaging Division and Optical Devices Division, FUJIFILM North America Corporation. “GFX100S II is the natural next step in the evolution of the product line that specifically caters to the needs of photographers who have wanted additional autofocus performance and responsiveness from their GFX100S cameras. We feel we’ve really delivered in that regard and done so in a way that allows it to keep its compact form factor, which means it can make an appearance in almost any creative setting.” 

GFX100S II is equipped with a new, high-performance GFX 102MP CMOS II large format sensor1 

 The new sensor has a diagonal length of 55mm (43.8mm in width x 32.9mm in height) which has approximately 1.7 times the area of a 35mm format sensor. approximately 1.7 times larger than a 35mm full-frame sensor, and paired with Fujifilm’s latest high-speed image processing engine, X-Processor 5, all housed within a compact body and weighing approximately 883 grams (31 ounces)

2Including the battery and the user’s memory card. , making it the lightest digital camera in the GFX System. 7-3, Akasaka 9-Chome Minato-ku, Tokyo 107-0052, Japan 

GFX100S II offers rich tonal expression and three-dimensional rendering capabilities, made possible by the unique characteristics of the large format sensor, with AI-based subject detection. It features fast and highly precise autofocus (AF) and continuous shooting speed of up to 7.0 frames per second

When using the mechanical shutter . The in-body image stabilization (IBIS) function achieves a maximum of eight-stop4 

 At CIPA standard compliant in pitch/yaw directions, with the FUJINON GF63mmF2.8 R WR lens mounted. five-axis performance, the best in the GFX System. In terms of video performance, users can create vibrant and smooth 4K/30P videos, allowing for high-quality video production as well. 

Main features 

Large format sensor with 102MP 

Improvement to the pixel structure in GFX100S II’s newly developed 102MP large format sensor has boosted the new sensor’s saturated electrons, enabling the use of ISO 80 as a standard sensitivity. At this setting and when shooting in 16-bit RAW, the camera can create images at greater dynamic range and with lower noise than with the previous GFX model. 

The new sensor’s micro lenses provide light use efficiency at the sensor’s edges. GFX100S II is equipped with a total of 20 Film Simulation modes, including REALA ACE mode, which combines faithful color reproduction and well-defined tonal expression. 

GFX100S II also includes the “Pixel Shift Multi-Shot” feature, which controls the in-body image stabilization function to shift the image sensor while creating photos. By creating a 16-shot RAW file, shifting the image sensor by 0.5 pixels for each shot, and using the dedicated software, “Pixel Shift Combiner”, to combine the 16 RAW files, it is possible to generate an image with approximately 400 million pixels. Additionally, the “Real Color” mode, which captures 4 RAW files with a one-pixel shift for each image, can generate images with a resolution of 102 million pixels while suppressing false colors, in only one-fourth of the imaging time and data volume compared to the previous GFX model. 

Powerful IBIS mechanism in a compact body 

The IBIS unit combined with gyro and acceleration sensors are designed to accurately depict even the slightest movement, along with the use of image information to detect shake and improve correction precision when creating an image. The camera’s IBIS mechanism also up to 8-stops of 5-axis stabilization performance, allowing creators who are working handheld to reliably, confidently, and comfortably create images even in low-light scenes without a tripod. 

The camera has a height of approximately 104mm (4 inches) and a depth of approximately 87mm (3.4 inches), similar to previous GFX System models. 

The body of GFX100S II incorporates Fujifilm’s BISHAMON-TEX textured exterior, designed to provide comfort and grip when holding the camera. 

Evolved high-speed, high precision autofocus (AF) and continuous shooting performance 

In addition to the evolved face and eye AF achieved through algorithm advancements, GFX100S II is equipped with AI based subject detection AF, developed with deep learning technology. It can detect animals, birds, cars, motorcycles, bicycles, airplanes, trains, insects, and drones

The ”Bird” Subject Detection setting is used to detect insects and the “Airplane” setting is used to detect drones. , and it features an improved AF predictive algorithm compared to previous GFX System models, enabling it to handle high-speed motion tracking situations effectively. 

With the new development of the 102 MP high-speed sensor and an exceptionally high readout speed along with a newly developed shutter drive, it achieves a continuous shooting performance of 7.0 frames per second. 

GFX100S II is equipped with a high-magnification, high-resolution electronic viewfinder (EVF) with a magnification of 0.84x and 5.76 million dots that is designed to suppress image distortion and flow caused by shifts in the position of the eye. 

4K/30P video recording capability 

With the new sensor in GFX100S II, the standard ISO100 is available in video mode to deliver even higher image quality in video footage than on previous GFX System models. 

GFX100S II is equipped with a tracking AF function during video recording. When using AF-C + Wide/Tracking AF, the user can easily track the intended subject, even in situations where multiple subjects are present. 

The camera offers 4K video recording at 30 frames per second and is capable of recording in 4K/30P 4:2:2 10-bit on a compatible SD Memory Card (sold separately). GFX100S II is offers compatible recording using Apple ProRes™ by connecting an external SSD via a USB Type C 

Certain recording modes of the GFX100S II may not be fully compatible with certain types of SSDs. Consult https://fujifilm-x.com/en-us/support/compatibility/cameras/list-of-supported-memory-cards/ for a list of confirmed compatible SSDs. 

GFX100S II is equipped with “F-Log2,” which offers a wide dynamic range of 13+ stops for recording, allowing for increased optimal flexibility in post-production, and it has the capability to record and output different video formats using different recording media and HDMI output. For example, users can record using “F-log2” onto any compatible recording media, while also simultaneously monitoring video via HDMI with any Film Simulation mode applied. This makes it easy to apply creative looks on set, but still retain flexibility for almost any post-production color workflow. 

GFX100S II offers an accessory-free, native Camera to Cloud integration for Adobe’s Frame.io, which allows users to wirelessly connect any GFX100S III to an active internet connection, authenticate it to Frame.io, and automatically upload photos and videos just moments after they are created. This can drastically reduce the amount of time needed to reach the end of any post-production workflow. GFX100S II is the latest GFX System camera to integrate Frame.io’s Camera to Cloud technology, joining GFX100 II in offering the capability. 

Optional accessories 

Hand grip (MHG-GFX S) 

This metal hand grip is designed to enhance grip and stability when image making with larger telephoto lenses and offers optimal convenience when using a tripod. 

Pricing and Availability 

FUJIFILM GFX100S II is expected to be available in June 2024 at a Manufacturer’s Suggested Retail Price of $4,995.95 USD ($6,749.99 CAD). The MHG-GFX S hand grip is available at a Manufacturer’s Suggested Retail Price of $149.99 USD ($195 CAD). 

Additional News: 

Membership in C2PA7 and CAI8 and efforts to develop a system to provide context and history for digital media 

In recent years, it has become an important global objective to work to rebuild trust online by proving the authenticity of photographs, videos and other online content. To further this effort and enable creative and business activities to continue to flourish, Fujifilm has joined two organizations, the Coalition for Content Provenance and Authenticity (C2PA) and the Content Authenticity Initiative (CAI). Fujifilm is collaborating with these organizations in their efforts to ensure that the originator of digital content can be verified online through Content Credentials. Through its association with C2PA and CAI, Fujifilm will assist efforts to develop a system to provide context and history of digital content by providing valuable information, such as the origin and record of content, to the digital file. Fujifilm is committed to ultimately applying this verification solution to its GFX and X series line-up.

Then we have the X-T-50. N0t a replacement camera fro any other model, but a new niche camera. It does share some features of the 100VI, as in the back body menus, and the battery is the same. Plus has a built in pop up flash!

It’s a great choice for the step up and using quality interchangeable lenses. Last overhead image is shown with the option of the new kit lens, 16-50.


The Official word

FUJIFILM North America Corporation, Electronic Imaging Division, today announces the launch of its FUJIFILM X-T50 mirrorless digital camera (X-T50), designed with the similar manual controls and classic camera styling of FUJIFILM X100VI and other X100 Series fixed-lens cameras, but with the flexibility of interchangeable lenses for those who seek added versatility in their everyday carry camera. Also introduced today is FUJINON XF16-50mmF2.8-4.8 R LM WR lens (XF16-50mm) featuring a versatile focal length range, making it suitable for a broad range of applications, from wide-angle landscape and architectural photography to portrait photography. With their lightweight designs and compact form factors, these new X Series innovations are designed for active image makers. 

“Passionate creatives are ready to grab their gear and create content at any given moment,” said Victor Ha, vice president, Electronic Imaging Division and Optical Devices Division, FUJIFILM North America Corporation. “X-T50 and XF16-50mm are made to be everyday-carry items; lightweight, comfortable tools that can be thrown in a bag for folks that are on the move. X-T50 is a great example of how we are keeping creativity top of mind for our users. From the dedicated Film Simulation dial to AI-based subject detection autofocus, X-T50 is more than ready the moment inspiration of any kind strikes.” 

X-T50 Mirrorless Digital Camera 

Dedicated Film Simulation Mode Dial 

For the first time on any X Series camera, X-T50 features a dedicated Film Simulation dial for fast, easy access to a wide variety of Fujifilm Film Simulations. There are a total of 20 Film Simulation 

-T50 including the recently introduced REALA ACE mode, which combines true-to-life color reproduction and crisp tonal gradations. The new Film Simulation dial is incorporated on the top plate, allowing users to intuitively switch between the included Film Simulation modes with ease. 

40.2 Megapixel X-Trans CMOS 5 HR Sensor 

X-T50’s compact and lightweight body weighs approximately 438 grams (15.45 ounces)1

1 Including battery and memory card. , and features the X Series’ popular back-illuminated 40.2 megapixel X-Trans™ CMOS 5 HR sensor and the high-speed image processing engine X-Processor 5. The latest image processing algorithm in the fifth generation X Series cameras delivers high resolution while maintaining a high signal-to-noise ratio. X-T50 is compatible with all X Series lenses, and the sensor’s high pixel count of approximately 40.2 megapixels is maximized by the digital teleconverter function2

2 Depending on the shooting mode, the digital teleconverter may not be deactivated or selected. , allowing images to be magnified by either 1.4x or 2x. X-T50’s pixel structure allows light to be captured efficiently; with ISO 125, the electronic shutter can be set to a shutter speed of up to 1/180000 second, achieving highly precise control of exposure time. 

In-body Image Stabilization (IBIS) and Auto mode 

X-T50 is equipped with a 5-axis IBIS function with a maximum of 7.0 stops

Based upon CIPA standard in pitch / yaw directions, and when coupled with FUJINON XF35mmF1.4 R lens. . While maintaining the mobility that has been a key feature of previous X Series models, X-T50 enables comfortable, hand-held image making, even in low light. Equipped with an AI-based subject detection autofocus (AF) developed using deep learning technology, X-T50 can detect animals, birds, cars, motorcycles, bicycles, airplanes, trains, insects, and drones4

Set the subject detection setting to “Bird” to detect insects or “Aircraft” to detect drones. . When in Auto mode, X-T50 detects the subject and tracks it while keeping it in focus, making it easy to create high-quality still images and movies. 

6.2K/30P and 4K/60P video capabilities 

For video creators, 6.2K/30P recording is available. Tracking AF functionality is also available for high-quality video recording. 

X-T50’s extensive 13+ stop dynamic range on F-Log2 is perfect for color grading. 

Sophisticated product design 

X-T50 features a 1.84 million-dot, tiltable rear LCD monitor inside a new, rounded body and grip, designed to fit comfortably in the hand while maintaining a compact size. 

A pop-up flash integrated into the viewfinder is mounted on the top plate, automatically controlling the amount of light needed for dark scenes and backlit portraits. 

Native Frame.io Camera to Cloud Connectivity 

X-T50 offers an accessory-free, native Camera to Cloud integration for Adobe’s Frame.io, which allows users to wirelessly connect any X-T50 to an active internet connection, authenticate it to Frame.io, and automatically upload photos and videos just moments after they are created. This can drastically reduce the amount of time needed to reach the end of any post-production workflow. X-T50 is the latest X Series camera to integrate Frame.io’s Camera to Cloud technology, joining FUJIFILM X-H2, FUJIFILM X-H2S, FUJIFILM X-T5, FUJIFILM X-S20, and FUJIFILM X100VI mirrorless digital cameras in offering the capability. 

FUJINON XF16-50mmF2.8-4.8 R LM WR Lens 

XF16-50mm is a standard zoom lens that covers a focal length range from wide-angle 16mm (equivalent to 24mm in 35mm format) to medium telephoto 50mm (equivalent to 76mm in 35mm format). It offers high-speed and high precision autofocus, with magnification of 0.3x at the telephoto end (equivalent to magnification of 0.45x in 35mm format), allowing the user to get as close as approximately 4cm (1.4 inches) in minimum focusing distance throughout the zoom range and as close as 15cm (approximately 6 inches) from the front of the lens to the subject. 

XF16-50mm features a weather resistant structure (weather sealing applied to 13 areas of the lens barrel) and is temperature resistant down to -10 degrees Celsius (14 degrees Fahrenheit), allowing for versatile use in a wide range of scenes. 

Adopting a lens configuration of 9 groups and 11 elements, including 3 aspherical lenses and 3 extra-low dispersion (ED) lenses, XF16-50mm suppresses chromatic aberration and maintains high-resolution performance throughout the zoom range. In addition to its high-resolution performance, XF16-50mm also has a close-up capability equivalent to roughly half that of macrophotography in 35mm format, making it effective for photographing food, crafts, plants, and various everyday scenes. 

Product Features 

Lightweight Design 

By optimizing the placement of the lens, XF16-50mm has a weight of approximately 240 grams (8.5 ounces), making it the lightest zoom lens in the XF lens lineup to date. 

The constant-length design, in which the lens does not extend during zooming, provides a truly comfortable zoom operation for users. 

Fast and accurate Autofocus 

XF16-50mm uses the inner focus method, which drives a compact and lightweight group of focus lenses with a linear motor. In addition, the high-speed and high precision autofocus system, achieved through the miniaturization of the focus lens group, creates accurate AF within approximately 0.015 seconds

5 Autofocus speed on the wide-angle end, using an internal measurement method compliant with the CIPA Guidelines, when mounted on the FUJIFILM X-T4 mirrorless digital camera and with Phase Detection AF and High Performance mode activated.. . 

Pricing and Availability for FUJIFILM X-T50 and FUJINON XF16-50mm 

FUJIFILM X-T50 digital camera will be available in Black, Charcoal Silver, and Silver with expected availability in June 2024 at a Manufacturer’s Suggested Retail Price of $1,399.95 USD ($1889.99 CAD). Additionally, Fujifilm plans to introduce a kit featuring X-T50 and FUJINON XC15-45mmF3.5-5.6 OIS PZ lens, at a Manufacturer’s Suggested Retail Price of $1,499.95 USD ($1,999.99 CAD). 

FUJINON XF16-50mmF2.8-4.8 R LM WR lens is also expected to be available in June 2024, at a Manufacturer’s Suggested Retail Price of $699.95 USD ($949.99 CAD). 

Alongside the release of the FUJINON XF16-50mmF2.8-4.8 R LM WR lens, Fujifilm plans to introduce kits featuring this lens with its FUJIFILM X-T50, FUJIFILM X-T5, and FUJIFILM X-S20 mirrorless digital cameras, each of which feature in-body image stabilization designed to maximize the lens’s performance. Manufacturers Suggested Retail Price of the X-T50 kit variations will be as follows:

FUJIFILM X-T50 with XF16-50mmF2.8-4.8 R LM WR Lens Kit: MSRP $1,799.95 USD ($2,429.99 CAD) 

LaToya Ruby Frazier – Monuments of Solidarity At MOMA

There is something very special about seeing a full range of an artist work for the first time.
The current exhibit of LaToya Ruby Frazier’s current full body of work, is one that already requires me to see multiple times.

It is thick and rich, with so many stories of the human condition, affected by the outside influences of the industrialized vagaries, it will be time well spent.

When you enter the gallery, you will see family and friend portraits, sometimes integrated with the artist in a self portrait.
Beautifully made, emotional connections, told in black and white. This is just the beginning of the viewers journey.

As you make your way throughout the massive space, you will get a few places to sit and hear some of the background audio describing artist events, like her performance outside of a Levi’s pop-up.
Or have a seat and listen to the stories of some of her subjects.


This is not just a display that you wander through, stopping at an image or two for further examination.

Take your time, and listen to the stories, and read about the subjects.
There is text coupled with photos as well, to give you a fuller understanding of the subjects situation.

From MOMA: :the sequence of original installations that she calls “monuments for workers’ thoughts,” which address the harmful effects of industrialization and deindustrialization, the healthcare inequities facing Black working-class communities in the Rust Belt, the ongoing water crisis in Flint, Michigan, and the impact of the closure of a General Motors plant in Lordstown, Ohio. Monuments of Solidarity celebrates the expressions of creativity, mutual support, and intergenerational collaboration that persist in light of these denials of fundamental labor, human, and civil rights. As a form of Black feminist world-building, these nontraditional “monuments” demand recognition of the crucial role that women and people of color have played and continue to play in histories of labor and the working class.”
“it is incumbent upon me to resist—one photograph at a time, one photo essay at a time, one body of work at a time, one book at a time, one workers’ monument at a time—historical erasure and historical amnesia,” says artist-activist LaToya Ruby Frazier.

All in all, MOMA has brought this activist artist to a space, with proper exposition of her body of work.

You may want to pick up the catalog, in case you can’t make multiple visits, to read all of the texts. Photographs are beautifully reproduced in the volume.

The Perfect Compliment To Your Curated Wall – Magnum Square Prints

It happens a couple of times a year:

The Magnum Square Print Sale!

Each sale always has a theme and this time it’s exploring the theme Fable, celebrating the symbiosis between visual and written narratives through a collaboration with three writers, who have composed stories and poetry inspired by a selection of images from the sale.⁠                                                                                                                    Each of the 85 images featured are available as signed or estate-stamped, museum-quality 6×6″ prints.

This is your opportunity to pick-up a right sized print, by an acknowledged master of the photographic arts.
These 6″x6″ prints are an affordable way for you to curate your collection with a high end accent image.

USA. British filmmaker Alfred HITCHCOCK, during the filming of “The Birds”. 1962.

How do I know?
I have 3 prints from previous Square Print Sales, framed and hung in strategic places in my 1 bedroom NYC apt: Jacob Aue Sobol, Elliott Erwitt, and Mary Ellen Mark. But those are my tastes.
As everyone knows, the way you hang your art is dependent on the physical flow of your place.
Eye-level, note how people, or yourself, travel through your space, and where the eyes go naturally.
That is where you want to hang these gems.
Because of the size, I did have archival mattes cut, although the frames came from Blick.
Go to the site, and select your faves.

1959. Jack and Miriam in bed in Bronxville, watching Jack’s show.

At $110 USD per, you can’t go wrong.
Trust me, I was just at AIPAD, and the print prices (yes, much larger) were much higher!

USA. New York City. 1992. ©Bruce Gilden

These prints are only available til Sunday, May 5, 11:59 p.m. EDT

Highly recommend you pick up some!

The Photography Show/AIPAD Is Back In The Best Venue – Park Ave Armory

The oldest photography show, AIPAD,  opened today 4/25, in a return to the classic venue of the Park Avenue Armory.
In speaking with the gallerists, everyone is thrilled.
With over 76 photography galleries from around the globe, no matter what your taste of style, it is represented here. And take a memory home to review, consider for purchase, or share.

One thing I always try to do is discover new work that challenges me, as well as revel in seeing some of my classic favorites in person.

So we’ll consider a few of those.

Sharon Walters, represented by HackelBury in the UK, exhibited unique pieces, with a singular,  one of a kind style.

By printing only one copy of an image, she uses a knife to cut away what is not needed. Like a sculptor. This piece below is juts one and a small one, that is represented.

Check out her short interview on my IG stories.

And there is Tatiana Parcero, from JDC Galleries

Using a combination of studio life studies and overlays of documents like astrological maps, naturalist drawings, she has created a message about the humanity and nature.


The overlays create a sense of depth that draws you in and has detail that keeps you there.

Casper Faasen, represented by Bildhalle Gallery, shares images of porcelain vases that appear behind slightly crackled fronts, creating a shadow box feeling. The images encased have a minimal bow in them to emphasize the shape. Come to the show to experience a full wall of them


Yes, you can sense a theme of what caught me.

There were the classics and the stalwarts of the galleries have a great, strong presence.

This is one of my favorite images of all time, made by Henri Cartier-Bresson.

Nothing like seeing a large print in person of one of Stephen Wilkes Day to Night Series, Flatiron.

And c’mon who doesn’t love a great Elliott Erwitt dog photo that greets you as you enter the venue:

Do not forget about the artist talks, and of course the book publishers who have their own special section on the right before you entire the main floor

You can relax and have a seat and bite or beverage,

You can “discuss” the work, with others,

and throughout the show, there are comfy benches to get off your feet, stare into the booths, and maybe just review your own photos.

It’s on through Sunday, and like every year a must see, to discover, and maybe add to your collection.

I know the galleries would love that!

Secrets Of The Octopus : Under The Sea Never Looked More Amazing!

I am a sucker for beautiful nature docs. National Geographic has been making these top quality films for years, and their brand stamp means you will get an engaging, brilliantly crafted experience every time, with a message to expand your knowledge of the natural world around us.

A week ago, we were all looking to the sky for the solar eclipse, so let’s reverse it and look at that magic of the ocean and its creatures.

With Nat Geo & Disney+, you have a new series to binge, created by Adam Geiger, James Cameron’s Director of Photography, and on this project he was director/writer/producer/director of photography.

Director and cinematographer, Adam Geiger, on board a dive vessel in Port Phillip Bay. (photo credit: National Geographic/Harriet Spark)

Over the last two-plus years, Geiger has dedicated himself to “Secrets of the Octopus,” spending about a year of that time underwater with eight key octopus species around the world.

Camera Assistant, Woody Spark, and Associate Producer, Harriet Spark, set up a special remote underwater camera system to film Day octopus (Octopus cyanea) on the Great Barrier Reef. (photo credit: National Geographic/Adam Geiger)

When I first saw this trailer below, I was hooked.


https://youtube.com/watch?v=SxOHYy1w92c%3Fsi%3DPDPwB8-wWunON3

And I had questions!

Luckily, those questions were shared with the Adam Geiger, the DP and creator of this series:

1)       During the making of “Secrets of the Octopus,” what was size of your crew?    

The film crew for Secrets of the Octopus varied by location, from a team as small as 4, up to 12 people. On most shoots, I had a second, experienced cinematographer working with me. A few times, we had concurrent shoots on opposite sides of the world, and we enlisted talented local camerapersons to capture specific sequences. No matter where we were filming, it took a dedicated, highly professional team to make it all possible, including dive supervisors on the surface, and an underwater team of both safety divers watching the camera team, and diving camera assistants to ferry around/change out/reload the 6 camera systems we often used on a dive. At every remote location, it was all-hands-on-deck to maintain the diving, camera and lighting equipment, preparing it all for hours of use each day.

2) What was the extent of the lighting being natural vs need to set-up lighting?

 My goal is to always make a scene feel natural. In almost every sequence in Secrets of the Octopus, we used underwater lights to enhance color and contrast. By day, that could mean one small light underwater to restore warm colors in the foreground, or at night, big lights on the surface to create a moonlit underwater seascape. The exceptions were a few scenes in water only a few feet deep, where lighting was impractical.

3) What cinema camera was used?

My talented team used a variety of cameras to record in Ultra High Definition. For maximum resolution and flexibility in the grade, we recorded in RAW formats:

RED Helium and Sony A1 in 8K; Sony F5 and A7Siii in 4K, and ZCam in 6K.

Camera assistant, Woody Spark, setting up the specialist underwater camera system that will be used to film Day octopus (Octopus cyanea) on the Great Barrier Reef. (photo credit: National Geographic/Harriet Spark)

Octopus can change their shape, colour and texture faster than the blink of an eye. And their behavior in the wild has hardly been studied. So, we needed to capture a huge amount of very high-quality footage to reveal the story and new science of each octopus. Ultimately, the shoot ratio was around 40:1.

5) What was the best time of day to shoot?

Octopus spend a lot of their time resting in a den — it’s the safest place to be in between their hunting trips. The shoots were based on when a particular species would be most active. The Day octopus, as its name suggests, was active during sunlight hours. But the Blue-ringed octopus is busiest at night. We often started our 4+ hour dives after 9PM, like in the cold waters of the Southern Ocean. Over time, we learnt when individual octopus were out and about. Like most natural history filming, it’s the animal who dictates when the cameras roll.

Cinematographer, Rory McGuinnes, operating an underwater jib arm to film a colorful coral reef on the Lembeh Strait. (National Geographic for Disney/Adam Geiger)

A Dorado Octopus. (mandatory photo credit: Schmidt Ocean Institute)

Director and cinematographer, Adam Geiger, preparing to descend on a dive to film Day octopus (Octopus cyanea) on the Great Barrier Reef. (photo credit: National Geographic/Harriet Spark)

I hope some of your questions were answered.

I always want to know the BTS!

The “Secrets of the Octopus” premieres April 21st at 8/7c  on National Geographic and all episodes stream April 22nd Disney+.

Grams(28) Upgrades Your Camera Bag With A Perfect Companion To Your Fuji X-100VI

If you are like me, and have a “few” camera bags, they are all situation dependent. Stealth, Utilitarian, & Travel.

One thing I didn’t have is a bag that I could bring into black tie event without sticking out.
Grams (28) has come to market with a beautifully made leather bag, designed with the photographer in mind.


Well Crafted, this bag sits ergonomically right on my shoulder, and has all the pockets and space needed.

Each detail has been well thought out, and was smooth working. Zippers, interior pockets, closures, and as you can see above, even the shoulder strap looks, and works, great. Continue Reading »

Nat Geo and ABC Share The Best Ways To Photograph The Solar Eclipse

The amount of coverage this event has generated is incredible!
If you are lucky enough to live in the path of totality, or even partial like in NYC, there are best practices for shooting the Solar Eclipse safely.

Presented by an astrophotographer, here is the link : https://tinyurl.com/natgeoabceclipse


 “Eclipse Across America” will simulcast live from 2:00-4:00 p.m. EDT across multiple Disney linear networks, including ABC, Nat Geo and Nat Geo WILD, as well as across direct-to-consumer platforms, including Disney+ and Hulu (via ABC News Live channel). Viewers will be able to watch the program from anywhere — TV, mobile, computers and more — on ABC News’ 24/7 streaming channel, ABC News Live

And yes, I’m ready to see what I can see, with proper filters: Continue Reading »

On Camera/Off Camera Flash – But why?

Think about the light you need, either as a creative solution, or because it’s too darn dark!

Chances are you have either a built-in flash on your camera, or hopefully, a separate unit.
Now, we’re not going to get into studio lighting as that is a massive subject, and just want to look at the more portable illumination here.


As a start, for events you really should use a separate flash, and you can either go to the camera manufacturers proprietary units, OR go high end with Profoto, OR more affordable Godox.
Let’s first look at the on-camera flash, units that are mounted onto the camera, as above.
One thing that I’ve always preferred, especially in daytime events, is a flash directly on camera with exposure compensating for the background and allowing it to still be seen and not throw your subject in a black hole.
Like the photo above, and below:


You can either mount the flash right into the hot shoe, as you can see above,

or use a custom bracket placing it on the same level as the camera,

or use a transmitter/ receiver situation, or  direct cable from the flash to the camera body, and using the flash off to the side, above, bounced or however you have to adjust for the environment and your personal style.

Here is how Vivian Maier did it:

And a photog from the recent Oscars:

Let’s go all Goldilocks on your possible options.

The Small:
I wanted to bring you a compact solution using a Fuji X100 series camera, and what I think, is one of the best tiny flash units out there: The EF-X20. Here it is mounted on the top. As you can see by the dials, you have a TTL option, and the lever on the side widens the flash reach. Don’t hate me, but it may only be available via EBAY. Worth it!

Have a look at this compact set-up below, and as you can see, you can either mount the small flash in the hot show, or for an off-camera flash lighting, adding in a set of Light Q transmitter receiver. So tiny. One thing to note is that they only work with the flash in Manual and not TTL. (the Light Q here is V1 and improvements may have been made in subsequent versions)

If you know how you shoot, and can assume your exposure consistency, you are good to go.
Yes, of course, determine your preferred distance from subjects, and desired DOF.
Flash runs on 2 AAA batts, so bring plenty. Recycle time is not stellar, but not the point with this set-up. Lower the output, and move closer.
The Medium:


Throw on a Fuji EF-60, or a Godox. Solid output, and you can just go with a transmitter on the camera if off-cam shooting, or just pop it on the body.
Wireless transmitters that does allows for TTL are the FUJIFILM EF-W1 Wireless Commander, that lives on the body, and can fire off the flash from the camera without a second receiver on the flash.

Batteries again, and of course use the rechargeble eneloops or similar. Bring a bunch!

The Large:
In this scenario, the camera is full size, and a Profoto A10.


Profoto makes transmitters specifically for your camera, so make sure you get the right one.
With a fast recycle time, rechargeable batteries, beautiful menu, and a round head, this is a main choice for an event where you will be able to probably shoot a 3-4 hour event with 4 rechargeable batteries. You can see above that I put a label on a rechargeable battery as there are 2 capacity options, A1 and A1X.


Also, with a flash of this size, you can add bounce cards/reflectors to the unit to soften or simply customize the light you want to work with.
As with all camera gear, what you use, depends on what you’re shooting. PLUS they make a wireless transmitter to sit on top of your camera. Connects immediately! Once again, match the transmitter to the flash and you camera brand.


In my EDC, is a Fuji x100, the EF-X20, and the Light Q transmitter/receiver set. The  option.

For a family/ friend’s event, you may want to go medium, so the gear is not overwhelming for your subjects. C’mon, you know them and want to keep it light (sorry).
For a full-on event- indoor or outdoor, wedding, business event, music (probably rock only, and be judicious with your flash!) even a portrait in a pinch.
This becomes, without question, the large option. For me the quality of the light, recycling time, and dependability,
Yes, it’s all about the look you are hoping for.

Now , it also comes down to how you are mounting the flash, if on camera.

There are 2 brackets I swear by- The Custom Brackets CB Mimi-RC.

Small, single pice brackets that holds the flash just in front of the camera body.

The other secret weapon I carry is the Newton Bracket. Not made anymore, but so well machined, and allows you to shift your flash from top to side, depending on your camera orientation. I usually don’t like sharing gear that is not currently made, but they have some on EBAY. Another item worth the hunt in my opinion.

There you have a basic breakdown of gear I use, and different combos.

There are other light modifiers I carry, but this collection are the basics, and used situation dependent.

Always remember to test your set-up before shooting, and bring plenty of batteries!

National Geographic Brings 6 Revealing Stories of Photographers To Hulu & Disney+

I have seen a TON of docs of photographers, and honestly, most of them concentrate on the image, and leave the stories of the heart, soul, and origins of the photographers behind.
Don’t get me wrong, I love seeing the process of the making of an image.
To me, knowing how the photographer got to the image and their personal journey is just as important.
Starting on March 18th, dropping on Hulu and Disney +, is a new series called Photographer, from National Geographic.

6 separate documentaries on some of the best photographers today.

From AcademyⓇ and EmmyⓇ Award-winning filmmakers E. Chai Vasarhelyi and Jimmy Chin, from Free Solo, you get a full picture, pardon me, of the artist behind their journey. With 8 incredible directors, they have brought an important series to the public about some of the finest Nat Geo photographers, told by some of the best documentary filmmakers I’ve seen.
Too much hyperbole? It’s all warranted. Continue Reading »

The Hottest Camera On The Internet Gets An Update

If you have been on any social media in the past couple of year, you know that the FujiFilm 100V has been one of the most sought after cameras.

Admittedly, i have using one of the X100 series for years, and it’s been the camera I grab when going out on the streets of NY. Lightweight, top notch optics, leaf shutter, and as i went through various models in the line, love all of the improvements along the way. Yes, I did pick-up the tl lens ad-on , and have used it in venues where it made the most sense. Easy to carry as well as fitting on all of the line-up as I upgrade to new models

Articulating LCD, and the more megapixels were the big ones for me on the X100V, and now they went above and beyond with the X100VI!

So, new processor with 40.2 megapixels, PLUS 5-axis image stabilization good up to 6 stops, and add in 20 film simulations for your creative choices. I usually just go with an Acros versions, and sometimes Provia. I shoot RAW so only used for jpeg export from camera.

And to further increase the versatility, this new model has 6.2K/30P movie recording capabilities.

There is a slight bit of additional LCD articulation, and I’ll take it!

The good news is also that the batteries from previous bodies can be used here, so no need to re-buy!

Size wise- it’s pretty much the same size as the X100V.

Of course the question is: Should you buy?

If you are not a current of the X100V, no question. And we have been told that availability should not be an issue. Fuji learned.

Should you upgrade? If you already have a X100V, you may not want to spend the dough, unless you can sell it.

The hot market may cool off, once the x100V1 once is available. I’m sure you will get a good price as it is still a sweet camera.

However, with all of the additional features, like IBIS and a 40.2 megapixel brand new sensor, your street work can get a huge upgrade.

And the price? About $1600 USD , and available in black or silver

And do want to mention the special edition X100VI:

Limited Edition X100VI Units:

To celebrate Fujifilm’s 90th anniversary year in 2024, a special Limited Edition of 1,934 X100VI cameras will be made available by Fujifilm, worldwide. The Limited Edition camera body is engraved with the corporate brand logo from Fujifilm’s founding in 1934, and each unit bears a unique serial number. These numbered X100VI units are packaged in a special, soft-release box that includes a special strap and Fujifilm history cards. The Limited Edition X100VI units will be available in extremely limited quantities and vary depending geographical location. Please contact your local Fujifilm sales and marketing company to explore the opportunity to purchase the item in your area.

This will be available for about $2000.


Fujifilm Debuts X100VI
Mirrorless Digital Camera X100VI’s iconic dial-based design and advanced technology includes new features for content creators of all types; special limited edition also announced in celebration of Fujifilm’s 90th anniversary
FUJIFILM North America Corporation is pleased to officially announce the highly anticipated launch of FUJIFILM X100VI digital camera (“X100VI”, pronounced X100 Six), the newest model in the popular X100 Series. X100VI offers outstanding image quality in a compact, lightweight body, and features Fujifilm’s legendary color reproduction technology, which is best experienced through its revered Film Simulation modes, a feature, users have come to expect from all Fujifilm digital cameras, along with In-Body Image Stabilization (IBIS) and enhanced video capabilities.

Product Features:

  • X-Trans™ CMOS 5 HR and X-Processor 5 deliver high image quality and high performance X100VI is equipped with the back-illuminated X-Trans™ CMOS 5 HR sensor1 with approximately 40.2 megapixels. The sensor has an impressive pixel structure that allows light to be efficiently captured compared to prior X100 Series cameras. Additionally, ISO 125, which on the previous X100V model was only an extended sensitivity option, is now available natively on the X100VI. With its fixed, 23mmF2.0 lens, X100VI delivers sharp, high-resolution images.

  • X100VI comes with 20 of Fujifilm’s popular Film Simulation modes, including the new REALA ACE mode, which applies a diverse range of distinctive tones to the user’s images. REALA ACE mode offers faithful color reproduction and high-contrast tonality, making it suitable for a wide variety of subjects and situations.

  • The camera incorporates an impressive autofocus (AF) prediction algorithm for reliable focusing, even when recording continuously-moving subjects. X100VI uses the subject detection AF X-Processor 5 to accurately track a range of subjects. Built using deep-learning AI technology, it can detect animals, birds, cars, motorcycles, bicycles, airplanes, trains, insects, and drones2.

    • Enhanced high performance to maximize X100VI’s range X100VI is the first camera in the X100 Series to incorporate a 5-axis, in-body image stabilization function with up to 6.0 stops, while generally maintaining the X100 Series’ characteristic compact size and lightweight, only having increased in weight by 1.52 ounces over the previous model.The “Advanced Hybrid Viewfinder” allows the user to switch freely between the optical viewfinder (OVF) and the electronic viewfinder (EVF), pursuing the rangefinder style of photography that has been a hallmark of the X100 Series.

  • The EVF is equipped with a high-resolution OLED panel with approximately 3.69 million dots, optimizing the immersive shooting experience. The “Electronic Range Finder” (ERF) function allows a small EVF to be simultaneously displayed on the OVF. Using this feature, the photographer can view either the entire frame or the area of critical focus, increasing the capabilities of a standard optical viewfinder. The ERF function is highly convenient, especially for street photography. 2 Subject detection setting should be on “Bird” to detect insects, and on “Aircraft” to detect drones.

    CIPA compliant, Pitch/yaw direction, when EVF/LCD is used

  • X100VI is capable of 6.2K/30P movie recording, a first for the X100 Series. The camera is also equipped with a tracking AF function during movie recording to ensure high-quality content creation.

    X100VI offers an accessory-free, native Camera to Cloud integration for Adobe’s Frame.io, which allows users to wirelessly connect any X100VI to an active internet connection, authenticate it to Frame.io, and automatically upload photos and videos just moments after they are created. This can drastically reduce the amount of time needed to reach the end of any post-production workflow. X100VI is the latest in FUJIFILM‘s digital camera portfolio to integrate Frame.io’s Camera to Cloud technology, joining X-H2, X-H2S, and GFX100 II in offering the capability.

    • Sophisticated, functional product design As with the prior model, aluminum is used for the top and bottom surfaces of the X100VI body. Aluminum, which features a high degree of malleability, is pressed and machined for crisp, clean edges, and the surface is finely blasted for a smooth texture. In addition, anodized aluminum is used on the camera surface to produce a high-quality finish.

  • X100VI’s ultra-thin tilt LCD monitor can be stored in a fully flat position, a design leveraged from the X100V. The stylish, integrated body design allows for a variety of shooting styles, from high to low angles. The shape of the grip has been fine-tuned to ensure a secure yet comfortable feel. The positions of the buttons on the back of X100VI have been designed to maximize ease of operation with the right hand, enabling extremely comfortable shooting while utilizing the viewfinder.

  • Wide variety of compatible accessories enhance X100VI’s capabilities Weather resistance is available for X100VI when the optional AR-X100 adapter ring (MSRP $49.99 USD/$50.00 CAD, available in silver and black) and the PRF-49 protection filter (MSRP $55.99 USD/$70.00 CAD) are used in conjunction with X100VI’s lens. This allows the user to continue making images in challenging weather conditions.

  • Fujifilm’s optional LH-X100 lens hood (MSRP $139.99 USD/$100.00 CAD, available in black and silver) is also compatible with X100VI. In addition to being lightweight and precisely crafted from machined metal, the hood is cleverly designed not to obstruct the field of view when looking through the viewfinder, thus achieving light-shielding performance.

  • Two separately offered FUJIFILM conversion lenses allow the user to change the focal length without changing the optical performance of X100VI, thereby enhancing the photographic field. WCL-X100 II (MSRP $349.95 USD/$450.00 CAD, available in silver and black) is a dedicated wide conversion lens that multiplies the fixed focal length by approximately 0.8x, converting it to 28mm (35mm format equivalent), while the TCL-X100 II (MSRP $349.95 USD/$450.00 CAD, available in silver and black) is a dedicated teleconversion lens for narrowing the field of view by multiplying the fixed focal length by approximately 1.4x, converting it to 50mm (35mm format equivalent).

  • Adding the separately offered, LC-X100V genuine leather case (MSRP $79.99 USD/$100.00 CAD) ensures the X100VI can be carried in style. The battery and the user’s memory card can be inserted and removed from the camera without the need to remove the camera from this case.

Pricing and Availability:
X100VI is expected to be available from Fujifilm dealers early March 2024 at a Manufacturer’s Suggested Retail Price of $1,599.95 USD and $2,159.99 CAD.
X100VI Limited Edition is expected to be available directly from Fujifilm commencing in late March 2024 at a Manufacturer’s Suggested Retail Price of $1,999.95 USD and $2,699.99 CAD.
For more information about X100VI, please visit this link .

Start 2024 With Perfect Color Using Datacolor

I have a great deal of respect for companies that are dedicated to their product line, and of course to their customers.

Yes, there are all of the camera manufacturers, who know once you are in a system, you will probably stay, unless you have unlimited funds. We could talk forever on each one, and why they are awesome.

I’m talking about the companies that support all of your image making, because if you don’t have the best output, it doesn’t matter what gear you had in your hand.

Think of brands like Adobe who are all about the digital image, and they maintain the product line and support for all that. Not hardware, but software.
Then you have a company like Datacolor who is dedicated to ensuring that all of the work you do looks great : When you are making the image, and then exporting the result. Yes, I’ve had more than a couple of posts where they were featured, but employing their full line is obviously something I take seriously.

Let’s go through some of the product line, and why I depend on them for my workflow.
Once you employ their tools, It’s all about getting the baseline, as in a correctly exposed and accurate file as they were shot. Once you have a baseline, let your creatives juices flow.

Starting from the right place is the idea, a little bit like starting with RAW, relatively untouched files.

For me, the first step is starting with a calibrated monitor.
What that means is that the monitor you are editing with should be calibrated to a standard color band. Not that you wouldn’t get creative,  and make sure the look of the photo or video has your look on it when you finish working on it.
This will ensure that you started with a  correct baseline. If you are not working with a calibrated monitor, the work you put into image, may not look the same once you get it into other environments. Like a book, or prints.
Enter the Spyder X2 Ultra calibration device.


It is so easy to calibrate your monitor, and the Datacolor software walks you through it.
Maybe it’s a 2 min process.
Essentially, you first set the device near your monitor on your desk so it can read the light in the room. (more on that in a sec)  Then the software walks you through the steps to hang the device onto your screen, as it cycles through the calibration process.

At the end you can save the profile for, perhaps, how your camera exposes in certain situations, like a wedding or event photographer who uses a certain lighting setup, even flash-on camera, and here is a bonus feature :
Monitors don’t keep their corrections forever. Just a fact of life. The Datacolor software sends you a reminder every month, so you know when to refresh the settings. I kinda like it when this pops up on my screen. A gentle reminder.


Genius!!

One thing to remember is that when you are working on a screen, the ambient light in your room will affect the perceived color.
In my day job, I produce commercials , and when we have been in the remote world, my biggest issue has been trying to see, on my home office screen, as close as I can get to the colorist screen.
How do they know what my ambient light is?
The Spyder X2 Ultra solves this issue, by having a sensor that takes that light by your monitor into account, as shown blow

And there is an additional feature in the software where you can turn on automatic ambient light adjustment. They took into consideration that the light in your post production area may shift during the day. You just have to leave the unit plugged in, and it will adjust your monitor(s)

OK, you have set your monitors, and you have a confirmed color, or a black and white baseline.

Next part of the equation, are the compact, portable color charts.                                                                                                      They are always in my camera bag, as the size allows for that.

One is dedicated to still photography. The Spyder Checkr Photo is a set of 4 color and B&W charts, set in a click stop case. Small, locking , and you can even replace the charts if you get a smudge or hand grease on it.
The way it works is that you preset the standard chart in your computer, and this can be done with include software and images.
When you are about to shoot, take and shot of the color chart near your subject, so that the lighting is similar. All about the light falling on the color chart.

Easy Peasy. I even have used it on the street, where I may photograph the chart, and then at least to have a standard to deviate from.


When you return to your post production set-up, take the shot of the color chart from your shoot and match it up to the sample. Then you Edit in Spyder and set the color.

Here is how you do that in LightRoom: go to Photo>Edit In>pick edit in SpyderCheckr (yes you do need to have the software installed on your computer for it to show up in the Edit In options)

Then there is a video equivalent color chart. Spyder Checkr Video.
Here is a basic video to give you a look at how it operates.
This works kind of in the same way as the photo checkr. However, the color correction is a bit more complex in video, as you are making adjustment on vector scopes that you use in your editing software, like Premiere  or DaVinci.


You still shoot some frames of the color chart and B&W reference. Go into the vector scope and match up the value from the chart
Do white balance, hue, and saturation for each scene that you captured
More for an advanced user, but starting with great color and exposure, before you add your creative looks.

And the PDF instructions for use. 

How else can you ensure a quality image?
As we are dealing with light, the way light falls on a subject can tell you about proper exposure.
Datacolor makes a very cool product called SpyderCube cube that has a ¼-20 thread so you can introduce it into a scene, and see how the light falls using black, grey and white surfaces to let you know when to add or subtract light in post, and get proper exposure in your working file.

There is also a reflective ball on top. Basically calibrating for the specular highlights. Use the highlight slider to adjust for that. Grey, and white sides to generally balance, and an interested black hole on the bottom, which represents the total absence of light.

All of these factors will lead you to a well balanced, and properly exposed image. Of course the color charts will give you much more information, and if you are shooting for a client with a packaged product especially, exact color reproduction is critical. We call these “color correct props” that are generally created by companies that specialize in this, and work from files that have been approved by a brand. Not what you may buy off the shelf.  As a photographer/director, you are responsible for making sure the product is accurate.

I recently published a book of photographs, and the need for correct color was never more critical.                                                            Before you go to press, you have to make sure that the files you supply are what you want the final image to look like. Datacolor Spyder X2 Ultra was the only way to go.

I was able to review PDF layouts from the publisher, and because I was looking at them on a calibrated monitor, if any adjustments were needed, I could easily see what they were.

Plus, the X2 Ultra accommodates multiple monitors, and as I was using 2, it allowed a perfect color matching on both
You know what they say, GIGO: garbage in, garbage out.

The Datacolor Spyder X2 Ultra is my go-to monitor tool, and I depend on it.
The color charts are always in my bag, as the size doesn’t take up much room.
The Cube can be used  even if you don’t want to bring out the full color chart: small, easily held by a subject in a portrait situation.    Even a location portrait!

There is another product of theirs that is more geared to my older kit of Nikon DSLRs.
It’s the DSLR’s that allow you to set your lenses focal point.
It’s called a Spyder LensCal.

What this product does is let you calibrate (that word again!) your lens to make sure that it’s focusing correctly. On my older Nikons I could adjust a critical focus point, and used this tool. When I first tried this, I was shocked how slightly misaligned some of my lenses were.

With current cameras, I would only use it to set a main focus point and then know what the depth of field was. Super niche and not sure you need it.

Have a look at their full product line. And if you are someone who prints, Spyder Print maybe the product you need:

“The Spyder Print software creates a fully editable, custom profile to ICC standards. You’ll get the most color-accurate reproduction of your image files and reduce ink and paper waste from repeated print outputs while optimizing the performance of your printer.”

Paper and ink waste has always been a problem for me, when I printed. Creating a custom profile could help your print sales.

It’s a poor craftsman who blames their tools, but you must keep them in proper order.
I have seen sales on these items from time to time, you can get set-up, and

Make sure your images from 2024 are all that they can be.
As I said in the beginning, Datacolor, as a company, is dedicated to this.

And Now, Your Moment Of Zen….

Happy New Year!
I think we can all agree that 2023 was challenging on so many levels.
But we all made it through!
On to 2024, and a new device to maybe help you keep your calm, and focus.
It’s something I keep in my nightstand and take it when I travel.
Whether you have stressful shoots, attend business affairs with a lot riding on it, or just look at this year ahead and know there will be a bit of tumult, this little unit will help calm the waters.
Nothing artificial, nothing you put inside your body.
It’s the Morphee Zen Pebble:


72 audio sessions designed by relaxation experts. Continue Reading »

Make The Memories IRL with FUJI Instax

First posted this about a year ago, but I think that it deserves another posting. When you go out , or party in for New Years. sure the phone may be your camera of choice, and maybe everything you see is so transitory that am IG story, or Snap will suffice.

But maybe the people you ring in the 2024 with, and the events surrounding it deserves a real life, in your hand, photograph. The printer below will let you take any image from your phone and print it out. Add a cardboard frame to make sure it’s displayed

The instant print game is pretty much owned by Fuji with the Instax line of printers.
That is not an opinion, it a fact.
As an Instax enthusiast forever, I love the instant gratification of the print in hand, and while I enjoy all the phone filters I can use to digitally share photos, there is something about a physical thing in your hand.

Have a look at this vid for a great walk through at this new addition: Continue Reading »

Photoinduced: How it Started, How Its Going

As the year ends, a little look back on how Photoinduced came to be.
After leaving a production executive position at a large ad agency late 2004, I wanted to see what was around the corner.
There was an idea that had been rambling around my head for awhile.
A place for photographers to go with a wide range of subjects addressing all of the joys of the world of photography.
Interviews with masters, gear reviews, gallery notices, and resources. This is what became Photoinduced.
Below is a post from 5 years ago about the journey, which continues today.
My deepest thanks to all of the loyal readers, the brands that have shared the latest in tech, and the photographers I have the utmost respect for, whom I’ve had the honor to interview.
This is kind of an origin story.
#TBT
13 years ago today, I woke up and wrote the 5 pg draft to a new business idea. A website, tied to on-demand content, with video downloadable to a phone for mobile consumption. There was a cable channel woven in, and a social media play (not sure if I called it that back then) It was photography based, and not my photography, but photography as a whole. Some of you out there may remember signing an NDA.
Yes, people thought I was nuts making a digital play, and who would have watched any full up video on a phone? Pipes
were not built yet to handle that, and phones were flip or blackberry.
Continue Reading »

We Knew It Wasn’t Over! Still Great Deals For End Of Year Gear!

Sure, there was Black Friday.
Then Cyber Monday
Then Green Monday.
And the sales continue..
If you are looking to make some purchase before year end, you are in luck!
I keep getting emails about sales continuing this week. Everyone wants to end the year on a high note, including the stores.
Here is also a link to all of the Holiday Gift Guides of 2023
What to get?
Well, as always, this is usually the best time to grab some media cards and hard or SSD drives. Prices seem to hover in a good place this time of year.
Then I would highly recommend getting your self a new Wacom tablet, and even if you have one, the latest ones, with BT and touch capabilities, make them the best computer base tool out there for your editing, and honestly, your everyday use thanks to that touch pad capability

Continue Reading »

Holiday Gift Guide #6: For The Road Warrior & Hybrid Worker

Whether you’re traveling or working from the home office, you need the right tools.
Or maybe it’s just the coffee shop, you want tools to help make it as easy as possible.
This is a big category, and I’ll try to group them into categories.

All of the items here I have used in the real world, and highly recco. The photos are large so you can see the details.

At home:
First of all, you want to have your laptop at a proper angel for comfort.
Twelve South has a perfect stand for that: The Curve


It’s a great height, and I just add on a  bluetooth keyboard and trackpad.
Then you want to be able to use your phone to possibly face time while reviewing work on the computer. Rolling Square makes a well-made, and elegant solution for this.


Reviewed here as well. 
With a modular system and magnets, your magsafe phone can be attached to your laptop and angle to the perfect spot. And it folds or is removable for travel.
Pick up an additional mag plate and one of their lights and you have a sleek working environment. Or even a charging plate.
A great stocking stuffer, is their InCharge  6 in 1 charging cable. Always have the right connector! Continue Reading »

Holiday Gift Guide #5 – The Audio!

Ok, let’s talk about audio.
You know that it’s 50% of your content, unless it’s bad. Then it’s 80%

Yes, this list hasn’t changed a lot from last year, except for a few big additions:

When you want to go more mobile, and connect directly into your camera , or to a portable mixer, the latest from Rode, the Rode Wireless Pro just works . With a receiver and 2 wireless mics, you can quickly hook up your subjects for an interview situation. Plus this new setup gets you 2 lavalier mics for a more discreet mic situation.And finally, a compact charging and storage cage. In NYC, I’ve seen the local news station using these as they cover the local beat.

This new version features a 32 bit float, which is essentially a secondary recording that can ensure a quality recording when you go to edit. N0t able to use direct into your camera, but it’s your audio  insurance. Read more about 32 bit floats here.
Good news is that it is also compatible with a lot of other Rode products. Honestly it may be a bit harder to find due to the popularity, but worth the hunt.

Another solid choice is the Deity Duo, Continue Reading »

Holiday Gift Guide #4 – Photobooks

I hope you all had a relaxing holiday and got to spend time giving thanks.
And if you were clicking the keyboard or hitting the stores, we all know that Black Friday gives way to Cyber Monday!
To be honest, I always feel that it’s SSD/hard drives, and media cards that can be the best deals on these 2 days.
As we move into the cooler months, nothing beats sitting down and turning the pages of a great photo book.

Here are the photobook gift suggestions for this year:

Any book by Paul Nicklen!
Paul, and his partner Cristina Mittermeier make the most amazing and beautiful photographs of our natural world.


Paul is a SeaLegacy co-founder, National Geographic photographer, acclaimed ocean conservationist, and TED Talks favorite, Paul Nicklen traces his extraordinary love affair with the polar regions in his most recent book, Born to Ice. His powerful images of iconic arctic and Antarctic wildlife and scenery, coupled with his inspiring photographic storytelling, blends ethereal beauty of the icy landscape with a compelling call to action.
Yes, previous descriptor was the official word. Continue Reading »

Holiday Gift Guide # 3 – Tools for Content Creators: Home and Mobile

It has been an interesting year in the world of image making.
There is major emphasis on content creators, and the equipment they may need.
And Black Friday sales will be active on these brands, with highlighted products below:
Joby, Pivo, Platypod, and LumeCube and Ankerworks

Usually the biggest deal are on Black Friday, but don’t stress: Cyber Monday is right around the corner!

Let’s break it down from basic to major:First of all, if you are using a phone to create, the first you need is the Joby Bluetooth remote control. Turn your phone recording on and off from a distance. Pairs fast on your phone, dependable. Great tool.

A perfect gift for the mobile creator is the Joby Beamo magsafe light. Giving 4 hours of light, this light attached to a mag safe phone, and if you don’t have one, they include a thin metal ring to place in your case of phone back. Continue Reading »

Thanksgiving Memories – This is not a shell


DSC_0042

Not like “This is not a pipe” (Ceci n’est pas une pipe) the famous painting by Rene Magritte, below

the-treachery-of-images-this-is-not-a-pipe-1948(2).jpg!HalfHD

Nothing like that. Well, maybe a little borrowed concept for the sake of this post.

Instead it’s a bit of memory that has a photo of an object as it’s touch point.

When I was a kid, we used to have thanksgiving dinner at our apartment. The cousins always joined us, the good flatware came out, and that’s just what you did.
Mom cooked the turkey in a paper bag to keep it at a certain moisture level, and the pies were a sweet pecan.
But the appetizer was the most unique item.
A seafood mixture with a creamy binder, the origins of which I can’t remember, and bread crumbs.

All mixed together and served in shells. Like the one shown above.
Continue Reading »

Holiday Gift Guide 2023 – #2: The Gifts That Don’t Need To Get Wrapped!

And here we go!
It seems like this year, the end of year sales have been coming earlier and earlier!
Since I wouldn’t want you to miss some of the great deals out there, we’re gonna start with software.
Of course, all of the software below have great savings this year, so if you want to grab a deal , or gift someone, now is the time!

No wrapping needed.

For all of your basic daily needs, there are 2 main players: Lightroom and Capture One. The world is split!

Lightroom is my jam, and it’s DAM (digital asset management) helps me locate the 360K images on my drives, plus be able to work some post production into the mix. The Creative Cloud also is a major daily set of apps that I use all the time. Plus when some of the designers I work with send a file over, I can generally open it with one of the apps in the CC.

Continue Reading »

Paul McCartney, Photographer : Eyes Of the Storm

So, a new Beatles song at #1, tours still happening, and now, a show of photographs by Sir Paul McCartney.

Below is one of my faves from the exhibit:

Paul McCartney (English, b. 1942)
George looking young, handsome and relaxed. Living the life. Miami Beach, February 1964
Photograph
©1964 Paul McCartney under exclusive license to MPL Archive LLP

Yes, it has been exhibited in the UK, although this will be the first showing in the States.

Should be an amazing perspective from one of the people on the other side of the camera at all times. I’d say it’s a book, less about the photography than the historical reference. To have that from one of the subjects of Beatlemania will please the most ardent Beatles fan.

The official word:

Continue Reading »

Holiday Gift Guide 2023 – 1st Up, Something For Your family

Sure, the deals are coming faster than ever this year, and in the coming days, the posts here will cover a range of gifts for the image maker in your life.
Or maybe just you!

With holidays here, your chances of hanging out with family are darn good, and I’d like to suggest something to you:

Interview and Record the elders in your family, and create a family history video that can be shared, cherished, and passed on.

dad-2

When my grandmother was 92 and my daughter was 2, I saw them hanging out, and knew that the knowledge of family history my grandmother had would never get told, unless she told it.
Some family members felt it would be revisionist history. You know what? It was the only history we had.
And everyone sees life through their own eyes and experiences. No one is objective.
So I sat with Grandma Kate, and my daughter at one end of her bed, and proceeded to ask her questions.
Even if she didn’t know what she ate the morning before, she knew her personal history.
With a video camera in hand, I made a record for us of who were, where we came from, what my dad’s life was like, and look into the past that only she could provide.
Since then I have a made a bunch of these, and honestly, as you hone your interview skills, shooting skills, you will have made a very special gift for yourself and your family.

There is a reason that companys like Ancestry.com and DNA kits have become so popular. We want to know who we are, and knowing where we came from is a big step in that direction.

It’s up to you.
With your skill set, the tools, and during the holidays, the PERFECT opportunity, you can create a video that would bring a lotta happiness to your family.

The picture above is my father when he was a radio announcer in NYC.
Never got to interview him, and always wanted to share the sound of his voice with my daughter. Didn’t happen.

Give your new gear a run through with a purpose. Plenty of time for selfies.
Just a suggestion.

If you own a company, and still are making your year end purchases, coming up are more gift guides to help you make some gear decisions. Plus more.

My personal go-to purchases at this time of year are media cards and hard drives. Boring maybe, but essential, and best prices this time of year.

One thing to note is that there will not be camera systems in the gift guide. Every brand comes out with new and improved models, yet to switch systems is not and easy or cheap move. You know what you like, and perhaps the new global sensor is what you are after. Or you want to wait for the 2nd gen.

What will be posted in the next days will be gift ideas that will help you, or the giftee, in their image making life

The Little Product That Is Going Right Into My Bag!

As I start gathering all of the latest products for our annual Holiday Gift Guide, I’m seeing an interesting pattern:
It seem to be 2 major categories: Content Creation Tools, and pro-end products all designed to make your projects look the best that they can be.

Let’s start with this MagSafe light from Joby. Called the Beamo™ Ring Light for MagSafe

Imagine a ringlight with 4 levels of intensity, 4 hours of power, that can be attached to your phone by MagSafe.


This little unit is complete with a mirrored surface to make sure you are lit right, and the best part: it stays on the back of your phone with the beauty of MagSafe. Continue Reading »

Social Content & Platypod, Plus More! : Tools For The Kit

How do we share these enriching experiences with a wider audience? In this digital age, social media reigns supreme, with IG reels and TikTok leading the way. Like it or not, it’s a fact.
Personally, I’ve embarked on a journey of increased content creation and discovered some invaluable tools along the way. When it comes to outdoor shoots, I’ve opted for a compact setup – I still shoot Fuji for those captivating stills reels and my trusty iPhone for additional IG reels and Tik Tok adventures.
I have kind of Frankestein-ed this from a variety of items in my general kit.
Depending on needs.

Here is a list:
*Platypod Extreme tripod Base
*Platypod Handle
*LumeCube phone holder
*LumeCube mini LED
*Manfrotto BallHead – (link is to a diff ballhead, than what is in the photos)
*Joby Impulse 2 Remote + (the secret weapon)
*Ankerwork M650 Microphones


Continue Reading »

Fall Will Bring A New FujiFilm GFX 100 II – Medium Format Flagship Gets An Update!

The FujiFilm update to their medium format camera has been rumored and is now about to become available.

The GFX 100II will be here this fall!


What do you get different from the last model?
For one thing the learnings of the sensor on the X-H2s, you get an improved 102MP Sensor with faster and better AF. We all need that!
Burst shooting has gone from 5 FPS to 8 FPS Continue Reading »

BH Sponsors a Gear Show, and PhotoFairs NYC Brings the Artistry

After a week in NYC with a gear show, Bild Expo, and an art show, Photofair, it became a meld of great effect. Both were happening within feet of each other in the Javits Center.

Bild Expo was created by BHPhoto and since PhotoExpo isn’t around, this may become the new deal. To be able to check out the gear, speak to brands about what you may be wanted to capture, and talks by photographers about their journey, was invaluable.

While perusing the new offerings of the latest gear , it was clear that there was indeed, nothing new under the sun, but improvements on what existed.
Great to see some of the brands that I have seen for years, still upping their game, and seeing familiar faces.

And mere feet away was a collection of over 56 global photo galleries, so you could see what some practitioners of fine art photography were creating.

PhotoFair was exhibiting some of the best artists in the field, with 56 galleries, representing about 120 photographic artists, plus talks by folks like Dawoud Bey, in a very comfortable setting.

Inspiring to say the least. When you see a major showing of fine art photography, it’ll make you examine your own path. Or bring you into the world of collecting.
Continue Reading »

Captivating Moments Unveiled: Bild Expo and Photofair Illuminate NYC’s Javits Center !

In September 2023, the city’s photography enthusiasts and professionals are in for a visual treat like no other. The Javits Center, nestled in the heart of Manhattan, is set to host two of the most anticipated photography events of the year: Bild Expo and Photofair.

Bild Expo: Where Creativity Meets Technology

Bild Expo, an annual photography exhibition and trade show, has become synonymous with cutting-edge technology and artistic innovation. In September 2023, it promises to be bigger and better than ever before. This year’s theme, “The Future of Photography,” is a nod to the dynamic fusion of traditional artistry and modern technology that defines the contemporary photography landscape.

Date: September 6-7 2023
Location: Javits Center, New York City

Key Highlights:

Exhibition Halls: Explore multiple exhibition halls showcasing the latest cameras, lenses, drones, and photography accessories from renowned brands. Get hands-on experience with the latest gear and see how technology is reshaping the photography industry.

Artistic Showcases: Witness the work of groundbreaking photographers, both emerging talents and established icons, in captivating gallery exhibitions. Get inspired by the diversity of visual narratives on display.

Educational Workshops: Learn from experts in a series of informative workshops covering topics ranging from lighting techniques and post-processing to storytelling through photography. Elevate your skills and gain insights into the industry’s latest trends.

Networking Opportunities: Connect with fellow photographers, industry professionals, and potential collaborators. Build valuable relationships and expand your creative network.

Photo Walks: Join guided photo walks in the vicinity of the Javits Center, led by experienced photographers. Capture the city’s iconic landmarks and bustling streets through your lens.

Photofair: A Celebration of Photography’s Rich History

Running right after Bild Expo, Photofair offers a unique journey through the history of photography. This event celebrates  photography, with 120 of the leading masters of the art

Date: September 8-10, 2023
Location: Javits Center, New York City
Key Highlights:

Don’t miss out on this extraordinary opportunity to immerse yourself in the world of photography, from its rich history to its cutting-edge future. Whether you’re a professional photographer, an enthusiast, or just curious about the art form, Bild Expo and Photofair at Javits Center in NYC this September 2023 promise to be an unforgettable experience that will ignite your passion for photography.

Prepare to be captivated, inspired, and moved by the incredible visual stories waiting to be discovered. Mark your calendars, pack your camera gear, and get ready to explore the limitless possibilities of photography in the heart of the city that never sleeps.

See you at Bild Expo and Photofair!


# TBT Story Behind The Shot #4

Story behind the shot(s)
Figured a good time to recount this event, as it’s the anniversary of Woodstock.

I was too young to go to Woodstock.
Bummer
Years later, there was an attempt at a re-creation bringing a ton of the folks that performed there.

Those that were still with us at that point.


Janis was gone, but Big Brother and the Holding company played.
Jimi, too, and his iconic version of the Star-Spangled Banner had to live in our collective memories.


Canned Heat, Chambers Brothers, Wavy Gravy, It’s a Beautiful Day, Country Joe & The Fish, Lee Michaels, and so many more played.


PLUS
Alan Ginsberg read from Howl to the rapt crowd. Meeting him was for me a major highlight.


Everyone let their freak flags fly and tried to recapture the vibe.
With less mud.
I shot with film.

Fast forward to a few years ago, on the 50th Anniversary, Morrison hotel Gallery invited Michael Lang, who was the main face of Woodstock, and had Henry Diltz, and Bob Gruen attend an opening of photos at the gallery.


Also included here are some shots of Baron Wolman, at a LA Gallery.


Plus, a who’s who of Woodstock photographers: Baron, Jim Marshall, Lisa Law, and Henry who all signed a classic photo from the event.


Sold for $20.


Why didn’t I get more as gifts??

Content Creators: Change Up Your Lighting Game!

We have all seen, and probably used, a ring light.
Basically, this gives you a shadowless light that may be flattering, although EVERYONE has been using this!
If you don’t believe me, have a look at the eye in a screen grab. In what we call a catchlight, you can see the ring light on the eye.
Not saying it’s bad, but maybe it’s time to change up your setup to add a bit more distinction to your content.
Joby has designed a full lighting kit for the smartphone creator with a new attention to detail: a background light.

It’s called the Beamo Deluxe Studio Lighting Kit! 

It’s a mouthful , so I’ll break it down for you. Continue Reading »

Maybe The Most Boring, Yet Critical Piece of Kit In Your Photographic Life

Sure, we all look at the latest camera bodies, glass, tripods, lights, bags (oh, the bags!) and more.
When it comes to your final output, what everyone will see, it’s about the tonal quality and color.
All of your post production adjustments are based on what you see on your monitor(s).
A little while back, I reviewed the Datacolor Spyder X colorimeter, and it has served me well.

When I am working on one monitor, that is.

So if that is your case, or if you work only on a laptop, that option is a great call.
However…..
I have begun the work on an upcoming book, and using multiple monitors, I needed to have the color match across them all.

Whether it is the post production on an image, or the layout of the book, having consistent colors across them all was critical.

That’s when I knew that the upgraded DatacolorSpyder X2 Ultra was the unit that would serve the project best.


Sure, they look the same, but the guts and software are the upgrade that was required.
Continue Reading »

#TBT The Story Behind The Shot #3

My VW bug was chugging its way up Telegraph Ave, like the little engine that could.
And it did!

That afternoon, on Sproul Plaza at UC Berkeley, Talking Heads were doing a free concert.
As a new fan, it was not to be missed.

They did the hits, and in a very strange timing, they sang Psycho killer as we all found out that Mayor George Moscone & Supervisor Harvey Milk were murdered by Dan White, a former supervisor in SF.
Because of this tragedy, Diane Feinstein succeeded Moscone as acting Mayor.

The concert was crowded, and afterward and I found myself backstage. Don’t ask me how.
I ended up capturing this portrait of Tina Weymouth, the bassist.

A couple of years ago, there was a screening in NYC of Stop Making Sense, attended by Tina and her husband Chris Frantz, the drummer for Talking Heads.
I had my advance ticket, so I got a 16×20 print of the portrait to give to her on the night.
Decades later, the story came to a right conclusion.

Pivo Max – Your Solo Creator Multi-Use Tool

While at CES 2023, part of the goal is to see what’s coming out new, that could be of use to all of you.
When I saw this Pivo Max, I couldn’t wait to give it a go, and see if it performed as expected.

What you have, basically, is a base that has a bluetooth connection to an app, which allows you to track your movements while shooting. Your camera will move with you.

The thing that brought me to their booth and impressed me the most was the strength of the motor allowing the use of a mirrorless camera.


As a content creator, you know that you need to push out your work in a variety of formats.
The most common being the 9×16 Vertical for social/smartphones, and the 16×9 for platforms like YouTube.
You may have thought that you need to shoot twice, once in each format, or compromise the framing to lean towards one or the other.
The Pivo Max  does indeed have a strong enough motor to allow you to mount both a phone and a mirrorless camera to capture your content at one time.

It worked as expected! When I see products in a trade show, you never know how a production unit will behave. This did not disappoint!


Sure, you may say that anyone can mount both units and get the same.
But the critical difference when using the Pivo Max is the dynamic look when you add motion tracking to the equation.
By connecting via Bluetooth to the app, you can have your cameras track you by face, or body.
Now, if your content includes moving around a gym, in let’s say, a training video, or even a horse riding instructional this set-up will track you easily and make sure your shoot captures your vid.
Of course you can hire someone, to be the camera person.
This setup lets you shoot as a solo creator!
The tracking on this app is so good, it was tough to get a product shot as I moved around to get the right light! It kept following me.
I’m showing a specific set-up getting all content in 2 cameras at once.

The Fuji X-H2 has a flippy screen so I could see the framing on the camera, and then I used the phone in a front facing camera so I could see what was being captured there. Like I said, a one person set-up. We all know that the front and back cameras on a phone have diff resolution, but for social, the quality is good. The Fuji gets the 4K files.

To activate the phone I use the included remote control. The camera was activated on the body, knowing I’d be editing that first part out.

You can just mount your phone, or tablet, horizontal or vertical on the base, or a tablet, and keep it simple. Probably a way most people will use this.


Maybe you just want to live stream, and a less complicated set-up is best.
I would also suggest connecting a good wireless mic system to complete the system.
For this review, I was just shooting video, no audio.

OK, you have a dual capture set-up, a single capture set-up, and there is more.
With a remote control included, you can also control the base via the app, or even without the app!
So, if you want that 180º or 360º shot you can easily do that with the remote. Either direction.
You can also adjust speeds of any of those movements.

I have looked at this category for years, going back to something called a Swivl, which used a large bulky tracker that you wore. Unwieldy at best.

The tech in this may appear simple, and it may be. It just works.
If capturing content, as a solo creator, with the ability to add dynamism to your video with a moving subject, I highly recommend this Pivo Max.

It does all break down pretty small and the phone mount has a ¼-20 standard screw mount as does the base. I just screwed on the camera, and as you see, added a cold shoe adaptor to the phone base to complete my set up. The Max does not come with that, but I’m sure you have one in your kit. If not, a cheap add-on.

I do use a Zhiyun tripod adaptor so the bottom can live on the base, and the top lives on the camera. I didn’t have to remove my fave wrist strap, the SpiderHolster wrist strap, my wrist strap of choice/

This can also be a great tool for real estate sales

With this, an agent can give a virtual tour of a property. I think content creation is where we live, but that is just another use case.

The main base unit is rechargeable, with 10-12 hours of battery life. You can also charge your phone/tablet through the base while you record as well.
the remote uses 2 AAA batteries.

One thing I will say that you should look at your motion and see how how is all tracked.

In a closer , let’s say 6Ft distance, try to do smoother movements as the tracking is so good, it will stop and start moving as you do. No lag, but immediate.

There you have it! from the trade show floor, into a real world situation, the Pivo Max does exactly what it promised. It costs about $250, but I have seen it on sale for as little as $175 USD.


BTW, here is a video for another product on the line, with a motor best suited for a smart, not the full combo. You may want to look at the whole line to see which unit is best for you


# TBT Story Behind the Shot – Tragedy on Red River

(please note, there is a possibly disturbing photo at the end of this post)
I had just seen/photographed St. Vincent perform at Stubbs, and it was an incredible set.

Making my way out, it was on to the next venue to hear some new music.
While walking on the street, the camera’s exposure was set for whatever may be seen on the street.
There was a rope blocking the sidewalk, making us all walk in the street.
All of the sudden we hear a car’s screeching tires, bursting through the flimsy barricade with a police car in hot pursuit.
The camera came up to my eye, with the continuous shooting sequence in action.
The driver plowed through the crowd of these poor young kids, just trying to party and get to the next venue.
The things I saw, are etched in my mind forever, and I’m not sure about posting some of them here.
I know I saw a young woman bleed out, while being attended to by paramedics.
There was a facility close by that had dispatched medical support immediately.
This one shot has stuck in my memory as it reminded me of Kent State.

Continue Reading »

Story Behind The Photo #2 – Maximum Security Prison with a Manson Family Member

Sitting in a friends living room, it was fascinating to hear the writer talk about interviewing a Manson Family member in max security, in a morbid way.
Then she said the photographer she took with her, totally screwed the assignment.
One camera, dressed a bit off, and was scared witless. Missed most of the possible shots.
She needed to find another photographer.
My buddy suggested me.
After looking at some of my photos she agreed.
I asked her when we would be going, and she said it would just be me, as she had already wrote the interview.
I did as much background as I could, and got notes from the writer.
With an official letter from the publication, a plane ticket, and my camera bags filled with his favorite cigarettes, I took off.
Nothing like hearing the actual door of a prison close behind you to know the truth.
While walking the line, my accompanying guard told me how much he respected my work from Nam.
I had never been to Nam. I said thank you.
Meeting with BB, I started to lay out my gear. There were some other inmates in the room, and I asked them all what they were in for.
The last one said I didn’t want to know.
I agreed, and gave him a smoke.
The guy knew his poses and we started to shoot.

During the process I asked him for his side of the story.
His freedom had been challenged, so he had to kill.
My gear was a Nikon F3, FM, and Nikon F that I always carried. Fully manual, and as the expression goes, I could hammer nails with it all day, and it would still be in focus.
And both of the other cameras did go down.
The final set-ups were done with the F. Whew!
Yes, I had a speedlight, changing bag (used when the cameras went down) and tons of film, B&W, and ektachrome.
There was one shot that I wanted to do, and the guard was a bit concerned.
With the lights out, or very dim, I wanted to spray the scene with a fire extinguisher for atmosphere and hit the scene with a flash. Hell, he had an automatic weapon.
So, we did it.


Throughout the shoot we talked a lot.
“When did you get those tattoos?”” In here” “Really, how?” “Broken guitar string and ink from a pen” “damn, that had to hurt!” “You know how long I’ve been in here? THAT hurts”
As a self-taught musician, we discussed his music, styles, etc.
After the shoot. I met with his therapist who told me he was really a good guy.
I sent him contact sheets, and transparencies, as I had promised.
A short while later, I was at home, and I get a collect call from the prison.
He wanted to chat.

Loved the photos, but unfortunately couldn’t get the slides as they were in plastic mounts and could have been made into a weapon.
How did he get my phone number?
The writer said he really like meeting me, and wanted to let me know he liked the photos.
Yes, I did change my number.
This was perhaps the most exhilarating, single photo shoot I had done.
The magazine came out and it was great to see the full page spreads of the photos.

#TBT – Story Behind The Photos #1

One of my favorite assignments was covering concerts at the Greek Theater in Berkeley.

Being a young, low on cash, photographer, Nikons NPS Service was always great about loaning me gear to supplement my owned kit.
The greats were there, and honestly, loved to photograph jazz musicians especially as they were the most chill.

I was hanging backstage, cameras slung on my body, with a bag loaded with extras.
Leaning against a wall, having a smoke, and one of the musicians came up to me.
“Say, are those Export A’s?” said Dizzy Gillespie.
“Yes they are” , I stammered back
“That’s my brand! Can I get one?” “Tell you what, if I can photograph you, I’ll give you a pack!”
He happily agreed, and we started to shoot!
Of course there was the classic puffed cheeks with the upward bell, which all went to just joshing around, playing congas and hanging out.
He ended up giving me a calendar from a Chicago jazz club, and some other things.
Most importantly, we had formed a photog subject bond, and through out the next three days, I was able to photograph him on stage, connect from the wings for more personal shots, And catch moments backstage with some of the other mega stars of the world of jazz.
Because I was hanging with Dizzy , it was assumed I was a “right “ guy, and the access was
invaluable getting moments with these other musicians.
Joni Mitchell was also on the bill, playing with Jaco Pastorius, Herbie Hancock, Tony Williams and Don Alias.
The list of talent was incredible, and the archives from that shoot are invaluable.

Remember when I told you that I was not a wealthy guy? Well, I was bulk loading film, and reusing film cassettes to save some dough. There was a roll that had unfortunate scratches, due to debris in the cassette, and through the years I have had those images worked on and ready for printing.
Just a cautionary tale.

Wacom Tablets – The Pro Move

I have been using Wacom tablets for many years, and the latest models are a great move forward.

Thinner, sleek design, lighter weight, better button design. Bluetooth has been available, just have to mention.

When you want to get more precise editing on your photographs, a mouse/track pad just won’t get you there.

OK, I know there are those that aren’t quite sure what the advantages are of a Wacom Tablet, or what the heck they even are.

Let’s get down to it before we get into some of the available options.

On a very basic level, a Wacom tablet is a separate work surface that connects via Bluetooth to your computer, and gives you an area to make precise corrections to an image. They come with a pen/stylus that lets you control things on your screen with a pen stroke, or push.
Primarily best in Photoshop, once you get familiar with the advantages, you will use it instead of a mouse/track pad, for pretty much every way you navigate on your computer. No matter what program you are using. This is also invaluable for illustrations. Drawing on a Wacom Tablet is the way to go!
The customizing of your available actions is all in your control.
I’ll get into some ways to customize in a sec.

When I tried to pass on one of my older Wacom Tablets to a fellow photographer, they had a visceral response, saying they were too hard, and complicated.

Doesn’t have to be!

Like all good tech, these have such a robust feature set, that you can set your levels of need, based on your skill level
Once you connect your Wacom tablet to your computer, you can go in and select from a menu of how you want to use it. Here you can see that it appears in your system preferences:


Personally, for the set-up, I keep it super simple:

Adjust the area on the tablet that is “active”: In other words, a 3in square can replicate the entire screen so you don’t need to drag your pen across the whole area. And if you use 2 monitors. you can select the area(s) that the tablet/pen is active.

Customize the buttons on the pen: Pressure is an easy select, and  Undo or Erase are the 2 most popular and used options, you can choose how they work


Set how the buttons on the tablet itself, will give you repeated actions that match your workflow.
Each button can also be selected to open a series of customized actions.


My advice is keep it simple, especially if you are new to this.
Now, some folks may say, ” I can just use my iPad ”
Want to know why that is not a great idea? The latency from the pen action to the tablet is so far superior on the Wacom, that it will cut down your possible frustration from things not happening in real time.

The Wacom stylus does not use a battery, so need to charge!
The Wacom tablet battery lasts for 15hrs so you will always be connected, unless you need those extra hours and can just plug in.

Yes, some of the current AI enabled masking options currently in Adobe software are great, no question, and you may think that these can help you retouch.                                    Sure thing, for global corrections, or major areas (Subject, Sky, Background)
But when you need to go in and really get specific on your post processing, you need the precision of the pen.
And if you are a portrait photographer, a delicate retouch on facial cleanup requires this set-up.
Try adjusting facial lines with a mouse.
Not happening.
What I use, is a simple, adjusted, smaller work area on the tablet (see above), zoom options, undo and erase, and various pressure sensitivities, left and right click, and double click.
On the Pro, where I prefer the medium size, you can add touch commands as well, so you can still get the track pad experience incorporated into your workflow. And more room on your desk!


The bluetooth gives you some freedom and no wires, although the pad is pretty close to my monitor mostly.
I haven’t gotten into the workflow of using your big screen for a couch centric work station.
Honestly, with a calibrated monitor, the Wacom, and a keyboard, my situation is pretty well set.

Now there are a few options to go with:

The Intuos Pro, Medium, my personal choice. This one sells for about $310. USD

It does come with a pen stand that also house a multitude of stylus tip styles for the heavy user.

Or, as a starter set-up, you’ll be happy with the  Intuos, Small, which is available with and without bluetooth. about a $20 USD difference.

Both come with training and software

So either $60 0r $80

Main differences are 4 customizable keys, not 8. The big deal for me was the touch pad. And the pen stand with extra stylus nibs is a great addition as well.

Whether you know the Wacom brand , or were wondering if you should jump in, now would be a good time!

There is one other part of the Wacom line that I love, but have yet to put in much time on.

It’s the Cintiq line, where you are actually working on a monitor as tablet so you can see all of your work right on the image as you are affecting it.

This one starts at about $650, which is waaaaay less than when I first started seeing these.

If you made it this far, I’ll bet you want more info.

 This video, from BH, gives a good overview

This can be a time saver and a new workflow for you, and once you have set it up, you will be sailing!

I work in ad agencies, and every art director I know, uses, loves, and couldn’t live without their Wacom.

Just saying.

Joby Smartphone “Swing” Slider – Upgrade Your Content

If you are a content creator, you know the gear you should have.
Or do you?
As most of the content on TikTok has, primarily, a static camera, and maybe a ringlight, hopefully some audio that is more than a headset mic, you may want to stand out a little bit more.
When I shoot an interview, for instance, I will use a 2-3 camera set-up, with one of the cams, on a slider.
What that does is add a bit of motion, even slightly, that gives you something to cut to or from, that adds visual interest to your production. In those instances I use the Edelkrone system on large tripods for stability, within the movement, and for the weight of the cameras.
If you are doing a smartphone bit of content, you kit is way smaller, and you may still want the extra visual boost of a moving camera. Chances are you will only use it as a “B” roll, or product insert shot.
Enter the Joby Swing Slider!
I’ve had a chance to work with this a bit and wanted to share a way I use it, although a bit different than the usual side to side.
How about in and out?


Now the goal is to have some elements for the camera to go past in this usage, so you have a true sense of depth. I had a camera, a Rubiks cube as you can see, with a Joby tripod supporting a business card, and added a puzzle ball behind, to complete the depth.

You can do the horizontal slider action, as well, but I wanted to show you another way to do it.

In addition, the slider connects to an app, and the connection is very fast.
You get to choose speed of the move and use the touch screen on the smart phone to set your start and stop points.

Plus you can do time lapses with the app!
I do love a good time lapse, and as I usually connect a camera to a power source, so as not to lose the shot, I have not yet tested this for long time lapses, and have just used the battery life on the unit. Since you don’t use those shots a ton, it ain’t Koyaanisqatsi,

And unless you are doing a ton of shots with the slider, the built in battery works just fine!

The unit also has a level so you can be sure to get your horizon line as you like them.


Have a look at this instructional video, so you can get an idea of its set-up:

Overall, I really like this unit. Also, feel that a heavier base camera stand may yield better results.
As you can guess, I only had the slider, and used other bits to put together the sample. I did use a heavier base camera stand for the video, by Edelkrone.


Yes, easy to do your vertical content, so no worries there!
One other thing to note is that the buttons on the iPhone may get pressed by you phone holder, but I’m sure you have experienced that before.
I mention it because the balance may be affected by how the phone is mounted, primarily in the horizontal format, depending how long you are having the slider travel.

So there you have it! About $140, for the whole kit.

Fuji Announces New Camera, Improved APP, & WA Lens

Big day of news over at Fuji, and we’re here for it!

Let’s start with the latest camera.

Now that everyone is vlogging (aren’t you?) the industry has come to answer your need!

The new Fuji X-S20, added in addition to the X-S10 has arrived with a ton of new features to make your vlogging heart skip a beat!

Thought I was over promising?
How about a Vlogging function on the PSAM dial!

One thing that influencers have always complained about is when they are talking about a product, and then hold it to camera, the time lag to refocus has been an issue.
This new camera is supposed to solve that lag issue.

From a larger battery for longer shooting time ( same as X-T4, X-T5 and H2, H2s),


to improved AF subject detect,

you may want to consider this as a dedicated influencer camera.

The 3.5mm mic and headphone jacks are on opposite sides of the camera, so may make your cable management easier.

the HDMI is the mini version.

the S10 is still in the line-up and at about $300 less, it may still serve your needs. But…..Get future proofed!


My only complaint is the single media card slot. But you can’t get everything!

That wasn’t all that was announced.

How about an improved Fuji app?

What’s that you say? About time? Yep, we agree, although I’m a big fan of the wireless firmware updates currently available.

They have added a history function so you can see just what you uploaded, film simulation. etc.

You still can’t upload a RAW or RAF file so be committed to your jpegs.

One of my main uses is when I do a pixel shift image, or remote control of the camera, and should be as good, or improved

And you did see the new wide angle 8mm lens on the S20 above.

The samples sent looked like there were no distortion issues, although I haven’t had a chance to shoot with it.

And for those of you out there with an X-H2, H2s, or X-T5, you get some updates as well:

Whew!

OK, there you have it!

Lots to go over.

Is this the camera for you?

I would say, as mentioned, that this could be a dedicated influencer/livestream/creator camera, with a ton of dedicated features for those operations.

Rolling Square – Form and Function Combine For A Brilliant Modular System

You know, whenever I go to trade shows, there is usually a trend in new products that can be spotted.
This year at CES, it was no different as manufacturers saw a need, and rushed to fill it.
Now as we all have been trained in the past 3-4 years to live on zoom calls, and while doing that, you may also need to communicate with your team/client via txt, slack, etc.
What we needed was a way to keep our phones at hand, and maybe needing to charge them while using that all, important second screen.

The most elegant, clean design I saw at CES was the offering from Rolling Square.
Called the Edge Pro system, this modular setup will serve you well, allowing you to attache your phone, and other essentials in a very slim design.
Not only slim, but a very clean design. All designed in Switzerland.                                                                                                       (Below are a combo of a video from the company, and actual photos by me of the product in use.)

take a look at this overview:

All in metal, the Edge Pro system is designed with a series of magnets, embedded within the separate units, and then you adhere these pieces to the back of your laptop, or computer case (which I did), and then add on the proper phone holder, or an adjustable light, or a phone charger. So you are adhering the silicon covered metal disks, and then the mag holders attach where you want them.

The magnets are a strong hold, and, as we are all about the magsafe phones or cases, you’re all good holding your phone. I was using it with an iPhone 14Pro

And they didn’t stop there.
With this system, you can also move it to an iPad, giving you that second screen. you can see that in the video above.

But wait, there’s more!
In the set you also get a round light that adjusts intensity and color balance!
Not the basic rectangular light, but that round beauty light make you look the best, in my humble opinion.

All about the catchlight in the eyes, right?
The light has a 5hr charged life and can adjust color temp, and intensity.
Here is the basic set-up that is an EDC (every day carry)

This is how it looks with just the magnet holders on the laptop case:

And here it is with the holders in place, from the back: (phone mag holder can be rotated & straightened.)

How thin is this? In other words when you put it into your bag, how much will it stick out? Barely at all. And you can always just take the mag connectors off, when traveling. Here it is with connectors folded and ready, and also with out connectors on.


And of course, you also get the magsafe phone charger that fits perfectly in the mag holder.
OR, just add another piece and you have a strong, simple hands free, phone holder.


For best results get 2 core pieces, in my opinion.

Or it works with one as well:

Sure, you will need a hub to connect your light and the charger to, let’s say, a MacBook Air at one time.
I use an EZquest hub for that, with multiple USB-C inputs.

As I mentioned, form and function. The clean design of this system drew me in at CES. And now that I have a sample, it’s better than that.
As we all may be moving to hybrid work and you need to travel your laptop, the connector, or home base as I call it. Folds in so slim, that it is barely noticeable, as you can see above.

I do wish there was a case that held all of the pieces, but I have pockets in all of my backpacks that do the job.

BONUS: As a run and gun photographer, who has to post fast, we all used to velcro a card reader to the top of a laptop.

Now you can use a ProGrade card reader , which has a metal plate in it, and have it held in place with one of the mag connectors.

I don’t want to come off as a complete fanboy, but when something is well designed, I want you all to know about it.

There is another line of products cables that they design, called Incharge-x. You see that in the above photo all folded up for travel?
So why are they good, well designed, and super useful?
Along with a rugged casing on the cable, each end has a sleek, all plug design so you are never without the right cable!
Check this out:

And you can go for the mini, seen above, which is always in my kit, all the way up to a longer version. They have from 1ft to 10ft  long, which stores in a silicon case.

BTW, the mini USB on the lightning output is hidden within the plug.  Genius!

In the case you also get hanger for stashing the cable near your computer. Or where ever you need to use it. Also mag, so the plug area will also just stick.

I write about these items, because they are the often overlooked, but much needed items.

When you show up at a job, or an office you want to look like you have the best usable, best looking kit, no matter what you are doing.
I do, anyway.

The Rolling Square line-up has a sleek design, and smart thinking behind it.

The expression goes, you never get a second chance to make a good first impression.

Lynsey Addario Delivers Commencement Address To School Of Visual Arts

Tis the season!

Yes, you will see alot of notable speakers at graduations this season, and for the world of photography, Lynsey Addario delivered one of the finest to the graduating class of the School Of Visual Arts, 2023.
I would suggest reading it in it’s entirety because there are great lessons in there.
It doesn’t matter if you are a graduate, a photo journalist, or someone who can appreciate the life lessons of a worldly correspondent

Here it is in almost it’s entirety:

Usually, when I’m invited to address an audience, it is to speak about my experiences as a war photographer. Which is not surprising since I’ve spent the last twenty-five years covering conflict around the world, and most recently, Ukraine where I returned two weeks ago.
Today, you sit where I once did. You’ve likely spent the last few years thinking about the work you want to create, and the impact you want to make with your art.
Continue Reading »

Panasonic Lumix 5SII : Best for Video, or Stills?

After seeing the Panasonic LUMIX 5SII at CES, finally had a chance to actually put it to a real world review.
Often touted as the best solution to mirrorless video capture, I also wanted to see how it performed as a still camera making it a solid hybrid choice.
Sure, I’ll be laying out some of the specs, which you should go through if deciding on a purchase, and these are the first impressions:
Below is the full framee Lumix 5SII and the Lumix 5SIIx. More on the differences later.

First of all, this camera has a great ergonomics and very solid build, so felt just right in the hands, from the get-go.

The deep grip on the right hand side, gave a sense of security in holding the camera at the ready. The placement of the primary dials and controls are in just the right proximity for adjustments.

Glad they do not have the lugs with a hole for connecting a strap, so my SpiderPro wrist strap attached perfectly! I’ve tried so many of these, and I swear by the SpiderPro.
If you are familiar with a PSAM dial for exposures, you will feel right at home.


On a still photography walkabout, AF was primo, and coupled with the IBIS, street photography was a breeze.

Honestly, it locked in on selected faces in a crowded street fair,
The phase detect AF was spot on, and let me relax as the crowd milled about to get the right shot.

With a hybrid phase-detect AF (PDAF), the focus didn’t “breath” and locked on.
The 20-60 lens was tack sharp as well,

As a street photography camera, the Lumix performed spectacularly.
Here is my local pizza joint, with a fast capture. While not a night shot, the light was super low, and the Lumix delivered admirably.

This billboard was street level, but the texture was critical as a test.

This camera line has been lauded for its video capabilities, and this new unit proves that love for this is justified.
There are no recording time limitations at any resolution.
Panasonic achieved this by adding a small cooling fan in the enlarged EVF hump.
That alone may be a reason to purchase.
Genius!

The lens supplied for the review, the 20-60, had a perfect focal length for video and vlogging, in a 16×9 or a 9×16 format

The camera uses 2 SD media cards, and that was surprise as most brands are switching to a Cfast B option for improved read/write speeds, especially video and for sports.
So Panasonic and Sony are the holdouts committed to the SD format, although on the new Sony, you have a choice of SD or CFast A.
To that point S5IIx does support internal SD card recording up to 600 Mbps in All-Intra (All-I) mode.

The new L2 Engine processes twice as fast as before, I’m told, and the main benefit is that it allows for less rolling shutter distortion.

We all want that.

CMOS has some inherent issues, and this get’s closer to the solution.

Like all of us, I do like to customize a camera button operations, and knowing what I’d like it to do and how I shoot, I dig into the menus, and get it set for a real world review.
The menus were easy to get into and adjust, and only a couple of times did I refer back to the manual to adjust.

It may seem like a small thing, but I have tested some other high end mirrorless cameras where the menu choices are so deep and buried, that it makes it impossible to shoot on the run. At one event, even the company reps didn’t now how deep to go to make, what I thought was a simple adjustment. I only mention this to let you know, that out of the box, the Lumix 5SII menus are very user friendly.

As you can see here, the camera with the 20-60 mm lens is light enough and balanced for an easy vlogging situation. The articulated, or flippy LCD, made vlogging easy. Of course, this camera has built in active IS, so even handheld you are in a better place.

Would need to play more with the color, as vid straight out of camera was a bit off for me, and checking files on a calibrated monitor. I am sure that with a chosen LUT, I would have been in a good place.

To that point, here’s another sweet part: you can load in a LUT ( predetermined color correction) on an SD card, use that to capture vid, and color correct IN CAMERA. Saves a ton of time in post, if you need to get the vid out super fast!
Or just save time in the edit bay!

My only issue was battery life. there may be an auto turn-off that I didn’t discover, but the drain was real.
Anyone shooting on the street, or in a paid setting would have extra batteries on hand, so may not be as much of an issue.

Honestly, was tempted to make a purchase if I wasn’t invested in another system.

I have been shooting with an APS-C line-up, and the full frame files on the Panasonic had me thinking twice.

One thing to note is part of the Panasonic commitment to pro video.

As an example, you know that Netflix has an approved list of cameras that can be used for content they license.

The LUMIX S1H is the first mirrorless cinema camera to join the Netflix Approved camera list.
No, it’s not the one I’m speaking about here, but that approval says a lot about the product line. Twice the price, DC-S1HBODY $3,999.99
but depends on your needs, it could be the game changer you need.
Even as a solid B-camera option.

A few specs:
S5IIx will output full-frame 12-bit 5.9K 30p (16:9) ProRes RAW video, along with cropped 12-bit 4K (actually 4,128 x 2,176) and 3.5K (3,536 x 2,656) video at up to 50p externally to an Atomos Ninja V+ HDR monitor-recorder. Both cameras also offer S&Q and HFR recording, letting you capture at high frame rate.

The LUMIX S5IIX is capable of RAW video output and All-Intra, ProRes*1 recording on SSD. It also features wired*2/wireless IP streaming function and USB tethering.
Other than the fully blacked-out body, the S5IIx has some interesting features not found on the S5II. You can record to the USB-C port, much as you can on the GH6 via a recent firmware update. Formats supported include All-I, ProRes 422 HQ and ProRes 422, all in 10-bit. That includes 5.8K (17:9) at up to 25p (1.6Gbps) and C4K (4,096 x 2,160) at 60p with an APS-C crop (1.9Gbps). That will require some kind of rig to mount a USB SSD, but those already exist and aren’t very expensive. Check out SmallRig for some well made options expensive.

Now that both versions are available, I’d opt for the S5IIx for the extra $200. More vid capabilities, and after all it is all black!

So to answer the question: is it better for stills or video?
The answer: YES!

A Classic Flexible Tool Adds To the Lineup : Joby Podzilla!

I know you have to have one of the most versatile, classic tools in your kit:
A Joby flexible tripod called the Gorillapod!
For many years, this company has given the photo and video community unique tools to capture images from anywhere!
Yes, years ago, I did the first Photoinduced review of the Joby Gorillapod lineup by attaching a heavy video camera onto a railing, and on the other side of the scale, had a point and shoot camera attached to a metal surface utilizing the magnetic feet of a much smaller unit.
These products, and honestly the full line from small to heavy duty, have been a standard in my kit. The solution to so many mounting problems.
Now they have come out with new version of the classic that speaks to a new market, the Podzilla!

It’s not a replacement, but an addition!
In the original, you had to add a tripod head to attach the camera (or light, or microphone)

With this new version, the ball head is built in, with a bubble level.

So with the Podzilla, you get a new visual design with the same quality and support.
You do have some restrictions on how heavy your camera can be, although the weight of cameras has gone down! It does support up to 5.5 lbs.

Who is this flexible tripod for?
The vlogger will now have an all-in-one tripod, the ability to wrap the legs around anything, or work with uneven surfaces to secure a mirrorless camera, or smartphone.

And the traveller who needs a versatile solution to get the unique shots, with a lighter weight.

I do feel that Joby has served my needs for almost 15 years! On a personal side, I have used it for face time calls with family when i need to share things like a birthday cake on a table and a regulation tripod won’t maneuver to the best place

As always, the right tool for the job.

To attach your camara, they have a separate ¼-20 standard tripod mounting plate to put onto your camera.

This way you can set your Podzilla to just the right place, and then add your camera with a fast, secure, snap in.

Or maybe just hand hold the whole deal!

They do have magsafe add-ons if you want to quickly place your phone to begin your content fast.

I would recco the large unit, for the most versatility with a range of cameras. And it’s just over 12″, so it’ll pack easy in your bag.

And of course, as I only mentioned, when you want to put an LED light into a specific place or want a microphone in a proper location for the best recording, these tools are in valuable. Put put that speedlight  where you need it!

Yes, this photo is from a review of Joby products i did in 2009. More down below.

Now, the collection I own of the Joby flexible tripods are all still in use, and at least one is an EDC (everyday carry) in my kit.

There is one other Joby Product that is ALWAYS in my bag:
It’s the BlueTooth record/shutter trigger for your phone. I have an older one , that still does the job.

There is a newer version called the Impulse 2, but I’m using an older, smaller unit that I picked up out of BH.

Here is the current version, that works up to 80 ft, and uses bluetooth 5.0


It is nice small device in reality, battery operated.

If you have ever wanted to do an on-the-spot social post, especially on your phone. This little gem will let you start and start your video hands off, and then no need to add that extra edit.

There have been many Gorillapod imitators. A whole lot. When you have a product that lasts like the Joby Flexible Tripods, as illustrated in this post, you should just follow the rule of buy the best, and buy it once.

As promised here are some of the photos using the Joby Gorillapods from 2009!

When a product line has been around for years, and still delivers, I’m on board!

Magnum Square Print Sale Adds a Twist!

You may have seen this print offering from Magnum come around before, and each time there is a new selection of photographers. Strong showing in this one, as well.

The Square Print sale runs from April 17th til April 22. If you happen to be in London, they will all be on display! However, I have purchased these based on the website, and have always been happy with the purchases.

This time, they have added some photographs from those not 100% fully immersed in stills, and still relevant.

The Joy of Flight. Teignmouth, Devon, 2000. © Roger Deakins

The above is by award winning cinematographer Robert Eakins. He has been reconnecting publicly with his photography roots, and is a true master.

Also check out his recent book.

So, why should you buy one or more of the prints?

Yes, they are square, and about 6″x6″. Signed if the artist is alive, or estate stamped. I own about 3 myself.
Basically, these are gems, that can be placed strategically around your living area, without a huge commitment to wall space.
Honestly, I live in NYC, and wall space is at a premium. Already tiling framed art around the pat.
With these, images, you can arrange them to be revealed as you and your guests move through your space. The price is very affordable, and framing with archival mattes won’t break the bank.

Here is one from Larry Sultan, who we lost in 2009.

Dad on Sofa, 1984 ©Larry Sultan Pictures From Home

One of my current favorite photographers Alejandro Cartagena, did a series of workers, shot from an overpass.

Do you want to go with a classic photographer, like WeeGee?

Here is a photograph of his, not usually seen:

Yes, I did say that they are adding some images that have interest, although not by names widely known in the world of photography.

Like Judd Apatow. Know for his many films, this is a shot of the cast of Anchorman. walking to set.

Hot Anchormen. The Valley, California, 2003.

On its face, not revealing. When you know the subject and the context, the interest value goes up.

As I said, I have a few of the square prints, arranged throughout my home, and do rearrange now and again. Just to get a refreshed view of the images.

I know you may think this is crazy, but I was educated by an art collector years ago about how to hang your art. And sometimes, re-arrangement and freshness is what you need to fully appreciate your collection.

Go have a look at the over 100 photographs, and pick your next piece of art.

Just remember, these images will not be reprinted in this format again.

When you are on the Magnum site, don’t forget to look around the shop for some other amazing artwork


Your Phone is Now Your Camera Monitor: Bigger, Brighter, And Always With You!

Whenever I go to trade shows, I’m on the lookout for tools that may make your life easier.
This iPhone Adaptor by AccSoon called the SEEMO, for your DSLR or Mirrorless camera came right to the top. An HDMI to IOS converter, has so many practical uses, you have to check it out.

OK, I’ll admit, I own and use Ninja V a recording and monitor device for my cameras. It was not cheap, and I had to add an SSD drive to record to, and batteries and cables. It does become a lot to set up, and heavy and bulky in the bag.

Sometimes, I want to simplify. This unit lets you use your smartphone as your much larger monitor, and although it only records in 1080P, max 60 FPS, if you want to, you can now livestream easily with the app, using your high end lenses and controls!

That capability alone will up your game on social media by far, and will lighten your load when you are on location.


Other than the adaptor, and a NP battery, and a couple of cables, your camera and phone are always with you. You will need the same batteries that the Ninja uses, and I’ll bet you have one or more of those.
Continue Reading »

The Photography Show (AIPAD) Is On!

Every year, we all have our favorite photo fairs, right?
After Paris-Photo, this is mine. The Photography Show  

44 Galleries from all over the world come together in NYC, to show, and sell, the work of photographers from Dorothea Lange, to Cig Harvey and a ton of your favorites in between. PLUS, there are free talks by some of the smartest and most talented people in the world of photography. Click the link and check them, and maybe see you there!

Whether you collect photography, want to be collected, or just love photography, this show will hit all the marks (check all the boxes?)

Some of my all time favorite gallerists , like Howard Greenberg, are showing a broad selection of work, with a walk through both floors guaranteed to speak to your aesthetic.

Here is Mr, Greenberg discussing a photo with a collector.

As this was the first day, the impressions are fresh, and overall, I have been exposed to a whole new range of photographers and approaches. Continue Reading »

Tools Of The Trade – Start Your Post Process Right!

Before your shoot….
Be prepared to get the best quality out of your project, with these simple steps below to get quality images.
And save time in your post production.

To start, there are a couple of things to carry if you are doing a shoot where there is time frame and money involved.
Yep, when you are hired for a shoot, generally, there is an expectation of delivery of files asap.
Just the way it is.
Of course, no matter what you are shooting, these tools below with help you create the finest images.

A: Color Chart
B: Exposure Calibration on set
C: Monitor Calibration

So Let’s get into iT!

One thing I have found is a must carry on your shoot is this: Continue Reading »

STM Brings Tools To Add A Second Screen

When you need that second screen..

I’ll say it’s a safe bet that when you are on a Zoom call, your phone is close at hand.

Whether it’s to txt with teammates, look at a message that was called out in a notification, or candy crushing your heart out, you need to have the phone in close proximity.

We all know that to just have the phone on the flat on the desk, or in your hand, looks obvious and could be construed as you’re not paying any attention, as your eyes go downward.
I have been looking for the best solution for years, and at the last CES, I saw some that may have solved it!

From the good folks at STM, they have presented 2 options:

One that sits, tripod like, on your desk, and using a mag safe case or just the mag safe phone, you can set your phone at the right angle for viewing.
Continue Reading »

Ankerwork Delivers With A New Wireless Mic System

The wireless mic category is growing fast as the number of content creators explodes

My main set-up was for years, a Sennheiser transmitter /receiver system and a Tram-50 or Sanken mic, both lavs, to get that personal; sound. Then Rode joined the pack and a ton of people jumped on board, even my local news station in NYC. DJI joined in earlier this year, and so many more have joined.

Ankerworks showed off the M650 wireless mic system at CES, and since working with it a bit, I have a def opinion and will go through the plusses and minuses

First off, from a physical perspective, having everything you need in a compact, charging case is brilliant. Well built, great design, and even with the included bag, it’s an easy carry. as you include the headphones, lav mic, connecting cables.
As you open the case you see the LEDs, letting you know how charged up you are, and these 3 parts will last about 7 hrs.
( BTW, I switched out one of the color caps on a transmitter, so you can see a diff. Very easy to do.)

Here you see the carry bag, with a set of headphones, and a Rode lav mic, kept separate from the charging case by sewn pockets, below: Continue Reading »